
Growing Oyster Mushrooms Indoors: A Simple Weekend Project For Beginners
Imagine harvesting your own fresh mushrooms in just a few days, right at home. Growing oyster mushrooms indoors is not only easy, but also rewarding. These mushrooms are fast-growing, nutritious, and taste delicious. Even if you have never grown anything before, you can succeed with oyster mushrooms. With simple tools and a few hours, you can start a project that brings nature into your kitchen. This article will guide you step-by-step, answer common questions, and share tips that most beginners miss. You’ll learn everything you need to know to grow oyster mushrooms indoors as a fun weekend project.
Why Choose Oyster Mushrooms?
Oyster mushrooms are a favorite for indoor growing. They are hardy, grow quickly, and adapt well to many environments. They also have a mild flavor that works in many dishes.
- Fast growth: Oyster mushrooms can mature in 7–14 days after starting. Some growers even see tiny pins (baby mushrooms) in as little as five days if conditions are right.
- Low-cost setup: You need only basic supplies—no expensive equipment. Many items can be found at home or purchased cheaply.
- Beginner-friendly: Even first-time growers can succeed. Oyster mushrooms are less sensitive to mistakes compared to other types.
- Healthy food: Oyster mushrooms are high in protein, fiber, vitamins, and minerals.
- Minimal space required: You can grow them on a kitchen counter, in a closet, or in a box. They do not need much sunlight or space.
Many other mushrooms are harder to grow or need special conditions. Shiitake and button mushrooms, for example, often require more precise humidity or temperature, and their spawn can be more expensive or harder to find. Oyster mushrooms are forgiving and don’t require precise temperature or humidity.
This means you can experiment and learn without risking a total loss if something goes wrong.
Oyster mushrooms also have a natural resistance to many pests and diseases, making them a reliable choice for those just starting.
Understanding Oyster Mushrooms
Oyster mushrooms belong to the genus Pleurotus. The most common types for indoor growing are:
- Pleurotus ostreatus (common oyster)
- Pleurotus pulmonarius (phoenix oyster)
- Pleurotus djamor (pink oyster)
- Pleurotus citrinopileatus (golden oyster)
Each type has a slightly different color, shape, and flavor. For beginners, the common oyster (Pleurotus ostreatus) is easiest to start with. It grows well in most climates and is widely available. The shape of the cap often looks like an oyster shell, which is how they got their name.
These mushrooms also grow in clusters, making them easy to harvest in bunches.
Nutritional Benefits
Oyster mushrooms are packed with nutrients:
- Protein: 3.3 grams per 100 grams. For plant-based diets, this is a valuable protein source.
- Fiber: 2.3 grams per 100 grams. Fiber helps with digestion and keeps you full.
- B vitamins: B2, B3, B5, B6. These vitamins help your body turn food into energy and support healthy nerves and skin.
- Minerals: Iron, potassium, phosphorus. Iron is important for blood health, while potassium helps control blood pressure.
- Calories: Only 33 kcal per 100 grams, so they are a light food option.
They are low in fat and cholesterol, making them a healthy addition to meals. In some studies, oyster mushrooms have also shown antioxidant and immune-boosting properties. While they should not replace medication, including them in your diet can support general wellness.
Oyster mushrooms are also easy to digest, making them suitable for people who may have trouble with heavier mushrooms or meat.
What You Need To Grow Oyster Mushrooms Indoors
You don’t need a greenhouse or special skills. The basic setup includes:
- Mushroom spawn: This is live mycelium (the mushroom root system) grown on grains or sawdust. It’s available from gardening stores or online. Good spawn looks white and smells fresh, not sour or moldy.
- Growing substrate: The material mushrooms grow on. Common options are:
- Straw (chopped): Most popular and reliable for beginners.
- Coffee grounds: Great for recycling, but should be fresh to avoid mold.
- Cardboard: Easy to find and simple to prepare.
- Hardwood sawdust: Good for advanced growers or bigger harvests.
- Container: A plastic bag, bucket, or a box with holes works well. Clear bags let you see the progress, but opaque containers help block too much light.
- Water spray bottle: For keeping the substrate moist. Use clean water—boiled and cooled water is best if your tap water is hard or chlorinated.
- Clean gloves: To avoid contamination. Disposable gloves are easy to use, but reusable kitchen gloves washed with soap work too.
- Alcohol or sanitizer: For cleaning tools and hands. Rubbing alcohol (isopropyl) is cheap and effective.
- Sharp knife or scissors: For harvesting. Clean these before use to prevent spreading bacteria.
Optional, but helpful:
- Humidity tent: A plastic sheet or bag to cover the container. This traps moisture and keeps the air humid.
- Thermometer: For checking room temperature. Not required, but useful if your room changes temperature a lot.
- Hydrometer: For measuring humidity, but not essential. You can often judge by touch or by checking if the substrate feels moist.
Comparison: Substrate Options
Here’s a simple table showing differences between common substrates:
| Substrate | Cost | Preparation | Yield | Beginner Friendly |
|---|---|---|---|---|
| Straw | Low | Easy | High | Yes |
| Coffee grounds | Free/Low | Easy | Medium | Yes |
| Cardboard | Free | Easy | Medium | Yes |
| Hardwood sawdust | Medium | Moderate | High | Yes |
Straw is the most popular substrate for beginners. Coffee grounds and cardboard are good choices if you want to recycle home waste. Note that coffee grounds can sometimes attract mold if not used quickly. Cardboard is very simple to handle, making it ideal for children or group projects.
Non-obvious tip: Mixing two substrates (like straw and coffee grounds) can improve yield and provide more nutrients for the mushrooms.
Preparing Your Workspace
Cleanliness is key. Mushrooms are sensitive to bacteria and mold. A clean area helps prevent contamination and improves success.
- Choose a workspace with little dust and good airflow. A kitchen counter, laundry room, or even a bathroom can work.
- Clean surfaces with alcohol or sanitizer. Wipe down tables, containers, and tools.
- Wash your hands and wear clean gloves. Trim your nails to avoid trapping dirt.
- Gather all supplies before starting. Arrange them so you can work quickly and avoid touching surfaces once you begin.
If you have pets or children, keep them away from the setup to avoid accidents. Small hands or paws can bring in bacteria or knock over your project.
Extra insight: Some growers use a portable plastic box as a “clean box” to mix spawn and substrate inside. This is not required, but it can help if your home is dusty or you want extra protection.
Step-by-step Guide: Growing Oyster Mushrooms Indoors
Let’s break down the process into clear steps. You can finish most steps in one weekend.
Step 1: Preparing The Substrate
Oyster mushrooms grow best on sterilized substrate. Sterilizing kills unwanted germs and mold.
How to prepare straw:
- Cut straw into small pieces (2–5 cm). Short pieces hold water better and are easier for mycelium to spread.
- Boil water and soak the straw for 1 hour. Use a large pot or bucket, and make sure the straw is fully covered.
- Drain and cool the straw to room temperature. Hot straw can kill the mushroom spawn.
- Squeeze out extra water—the straw should be damp, not dripping. A simple test: Squeeze a handful. Only a few drops should come out.
How to prepare coffee grounds:
- Use fresh or spent coffee grounds. If they sit for more than a day, they can grow mold.
- Pasteurize by pouring hot water over them and draining excess water. Let them cool completely.
How to prepare cardboard:
- Tear cardboard into strips. Remove any plastic, tape, or colored ink.
- Soak in hot water for 1 hour. The water should be hot but not boiling, to avoid breaking down the cardboard too much.
- Drain and cool. Squeeze out extra water.
Many beginners skip sterilizing. This often leads to mold. Always sterilize substrate for best results. If you don’t have time to boil, you can pour boiling water over the substrate in a bucket, cover, and let sit for an hour.
Pro tip: If you’re growing more than one batch, label your containers by date or type to track your experiments.
Step 2: Mixing Spawn With Substrate
Once the substrate is cool and moist, mix in the mushroom spawn.
- Put substrate in a bowl. Use a large mixing bowl or a clean bucket.
- Add spawn (about 1/4 cup spawn per 1 kg substrate). More spawn can speed up colonization, but too much is wasteful.
- Mix gently with clean hands or a spoon. Make sure the spawn is evenly spread, so mycelium reaches all parts.
Don’t use too much spawn—it wastes money and can crowd mushrooms. Too much spawn can also create competition for air, leading to smaller mushrooms.
Extra insight: If you want to try several varieties, split your substrate and add a different spawn type to each section.
Step 3: Filling The Container
Choose your container—a plastic bag, bucket, or box.
- Fill with the mixed substrate and spawn. Press gently, but don’t pack too tight. Mycelium needs air to grow.
- If using a bag, poke holes (about 1 cm wide) every 10 cm. A sharp pencil or chopstick works well.
- If using a bucket or box, drill holes in the sides. Space holes evenly for good airflow.
These holes allow mushrooms to grow out and air to circulate. If there aren’t enough holes, mushrooms may only grow at the top and get crowded.
Pro tip: Place your container on a tray or towel to catch any leaks. This keeps your workspace clean.
Step 4: Incubation
Incubation is when the mushroom mycelium spreads through the substrate.
- Place the container in a warm, dark area (20–25°C or 68–77°F). A closet, cupboard, or under a table works well.
- Cover with a plastic sheet or humidity tent. This keeps moisture in.
- Leave for 10–14 days. Do not disturb the container too much.
The substrate will turn white as mycelium grows. Check every 2–3 days. If you see green, black, or pink spots, it’s mold—remove and discard affected substrate.
Non-obvious tip: Many beginners ignore temperature and humidity. Too cold or dry slows growth. Room temperature and 80–90% humidity are ideal. If your home is dry, spray water inside the tent or cover to keep humidity up.
Extra example: If you live in a dry climate, place a damp cloth near your container or put a cup of water inside your humidity tent.
Step 5: Fruiting
After the substrate is fully colonized (white and solid), move the container to a spot with indirect light.
- Remove the cover or open holes for air. Mushrooms need fresh air to form properly.
- Mist with water 2–3 times daily. Spray the sides of the container and the surface of the substrate.
- Keep humidity high. You can cover loosely with a plastic tent or bag, but don’t seal it shut.
Within 5–7 days, small mushroom pins will appear. These are baby mushrooms. Pins can double in size every day if conditions are right.
Extra tip: If pins do not form after a week, try moving the container to a slightly cooler area or increasing air exchange.
Step 6: Harvesting
Oyster mushrooms are ready to harvest when caps are 5–10 cm wide and edges curl down.
- Use a sharp knife or scissors. Cut close to the base.
- Harvest all at once or over a few days. Some mushrooms may mature faster than others.
Don’t wait too long—older mushrooms become tough and lose flavor. The best time to harvest is when the caps are still curved down and before they flatten out.
Non-obvious insight: If you see a white powder on the caps or nearby surfaces, these are spores. It means the mushrooms are fully mature—harvest quickly to avoid allergies and maintain quality.
Step 7: Cleaning Up
After harvesting, you can reuse the substrate for another cycle or compost it.
- Remove old substrate from the container. If you want to try for a second flush, mist the substrate and let it rest in a humid area for another week.
- Clean container with alcohol before starting again. This prevents mold and bacteria in future batches.
Extra example: Used substrate can be mixed into garden soil or composted to improve your plants’ health.
Practical Tips For Beginners
Success comes from small details. Here are tips that most guides miss:
- Humidity control: Place your container on a tray with water. Cover with a plastic bag to trap moisture. If you notice the substrate drying out, increase misting or add a small cup of water inside the tent.
- Air exchange: Mushrooms need oxygen. Make sure holes aren’t blocked. Open the tent daily for fresh air. Stale air can cause long, thin stems and small caps (a problem called “legginess”).
- Light: Indirect sunlight is best. Avoid direct sun—it dries mushrooms. A north-facing window or a spot with filtered light works well.
- Temperature: Too hot (>27°C/80°F) stops growth. Too cold (<16°C/60°F) slows it. If your room is too cold, try moving the container near a warm appliance (but not on top).
- Mold prevention: If you see mold, remove it fast. Clean tools and start again if needed. Never try to eat mushrooms from a moldy batch.
- Substrate recycling: After one harvest, try growing a second batch. You may get smaller mushrooms, but it saves money. Some growers get a third, very small flush.
- Observation: Take notes or photos of your process. This helps you learn what works best in your home environment.
Common Mistakes To Avoid
Many beginners make these errors:
- Using unsterilized substrate (leads to contamination).
- Overwatering (causes mold). The substrate should be damp, not wet.
- Not enough air holes (mushrooms suffocate).
- Harvesting too late (tough mushrooms). Check daily once pins appear.
- Ignoring small signs of contamination. A little mold can spread quickly.
- Not weighing down the substrate in the bag. Sometimes, loose substrate dries out faster. Press gently to keep it compact.
It’s normal to lose your first batch. Don’t give up—each cycle teaches you more. Even experienced growers lose batches sometimes due to weather, contaminated spawn, or accidents.
How Much Can You Harvest?
Yield depends on spawn, substrate, and care. On average:
- 1 kg substrate yields 250–500 grams mushrooms per flush.
- You can get 2–3 flushes from one batch.
A flush is a cycle of mushroom growth and harvest. The first flush is usually the largest; later flushes are smaller but still tasty.
Oyster Mushroom Yield Table
This table shows typical yields for beginners:
| Substrate Amount | Expected Yield | Time to Harvest |
|---|---|---|
| 1 kg | 250–500 g | 10–20 days |
| 2 kg | 500–1000 g | 10–20 days |
| 5 kg | 1.25–2.5 kg | 10–20 days |
Yield can vary. Some factors are spawn quality, substrate freshness, and humidity. If you use high-quality spawn and keep conditions ideal, your harvest can be at the upper end of these ranges.
Non-obvious insight: If your first flush is small, try soaking the substrate in cold water for 4–6 hours, then draining it and waiting a few days. This “shocks” the mycelium into producing more mushrooms.
Oyster Mushroom Varieties: Which To Choose?
Each oyster mushroom has unique traits. Here’s a quick guide:
- Common oyster: Gray or white, mild flavor, easy for beginners.
- Pink oyster: Bright pink, peppery taste, grows fast but sensitive to cold. These are very attractive but lose color when cooked.
- Golden oyster: Yellow, nutty flavor, likes warm conditions. Popular in Asian dishes.
- Phoenix oyster: Pale color, tolerant to heat, good for summer.
Choose based on your climate and taste. Most stores sell common oyster spawn.
Non-obvious tip: Mixing varieties in the same container is not recommended for beginners. Each type has different needs and may not grow well together.
Variety Comparison Table
| Variety | Color | Flavor | Growth Speed | Climate |
|---|---|---|---|---|
| Common oyster | White/gray | Mild | Fast | All |
| Pink oyster | Pink | Peppery | Very fast | Warm |
| Golden oyster | Yellow | Nutty | Fast | Warm |
| Phoenix oyster | Pale | Delicate | Fast | Hot |
For beginners, common oyster mushrooms are best. Try other varieties once you gain experience. Each type can bring a different look and taste to your dishes.
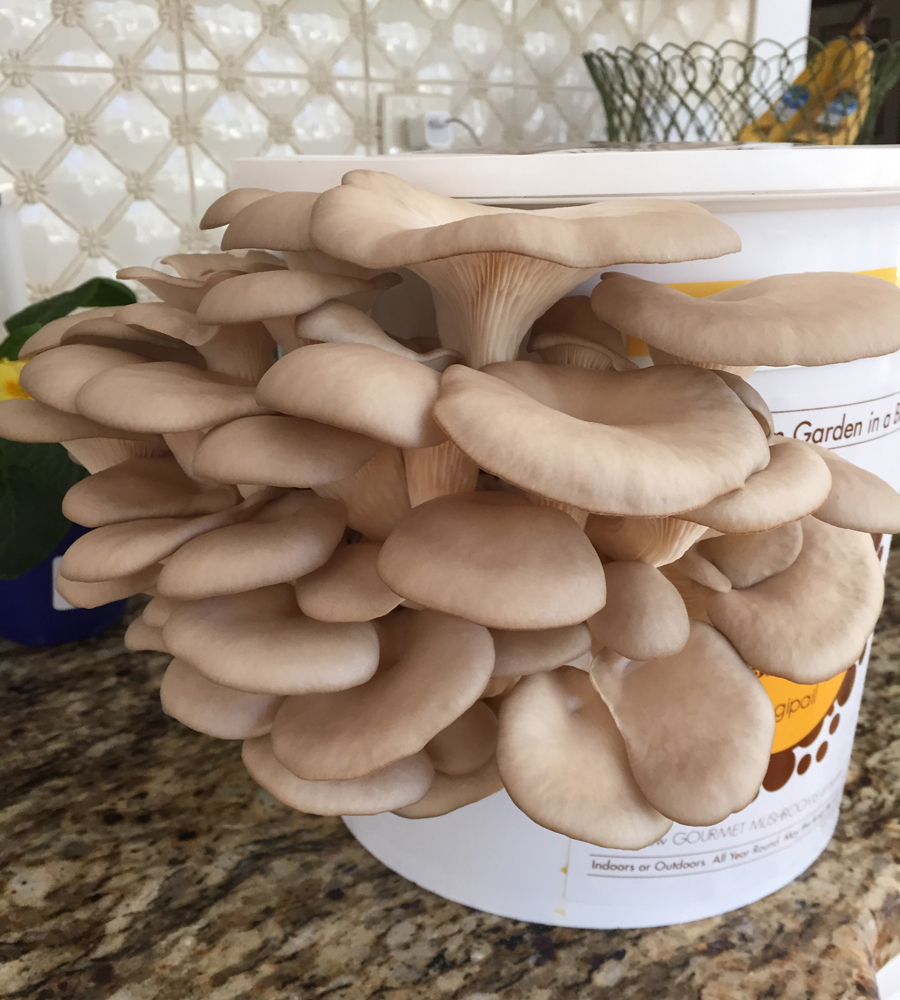
Credit: www.enchantedgardensdesign.com
The Science Behind Mushroom Growth
Oyster mushrooms grow using mycelium, a network of white threads. Mycelium breaks down substrate and absorbs nutrients. When conditions are right (humidity, temperature, air), mycelium forms mushrooms.
Unlike plants, mushrooms don’t need sunlight to grow. They do need light to produce mushrooms, but not for energy. This is why indirect light works.
Non-obvious insight: Oyster mushrooms release spores as they mature. Spores can cause allergies in some people. If you notice sneezing or irritation, harvest mushrooms early and ventilate the area.
Extra explanation: The mycelium is like the “roots” of the mushroom. It stays hidden in the substrate until it senses the right signals (humidity, air, light), then “fruits” by sending out mushrooms. This is similar to how plants flower, but much faster.
Cooking With Oyster Mushrooms
Once harvested, oyster mushrooms can be used in many recipes:
- Stir-fry: Sauté with garlic, onion, and vegetables. Their soft texture absorbs flavors well.
- Soup: Add to broth for extra flavor. Oyster mushrooms hold their shape better than button mushrooms in soup.
- Pasta: Mix with cream sauce. The mild taste pairs well with herbs and cheese.
- Grill: Roast with olive oil and herbs. Grilling brings out a nutty flavor.
Storage tips:
- Keep mushrooms in a paper bag in the fridge. Plastic bags trap moisture and can cause mold.
- Use within 5–7 days. After that, they dry out and lose flavor.
- Don’t wash until ready to cook—water makes them spoil faster. Brush off dirt with a soft brush or paper towel.
Oyster mushrooms are best when fresh. Their texture and taste are ideal for Asian and Western cuisines.
Non-obvious tip: If you harvest more than you can use, slice and freeze them raw. They keep their texture better than many other mushrooms when frozen.
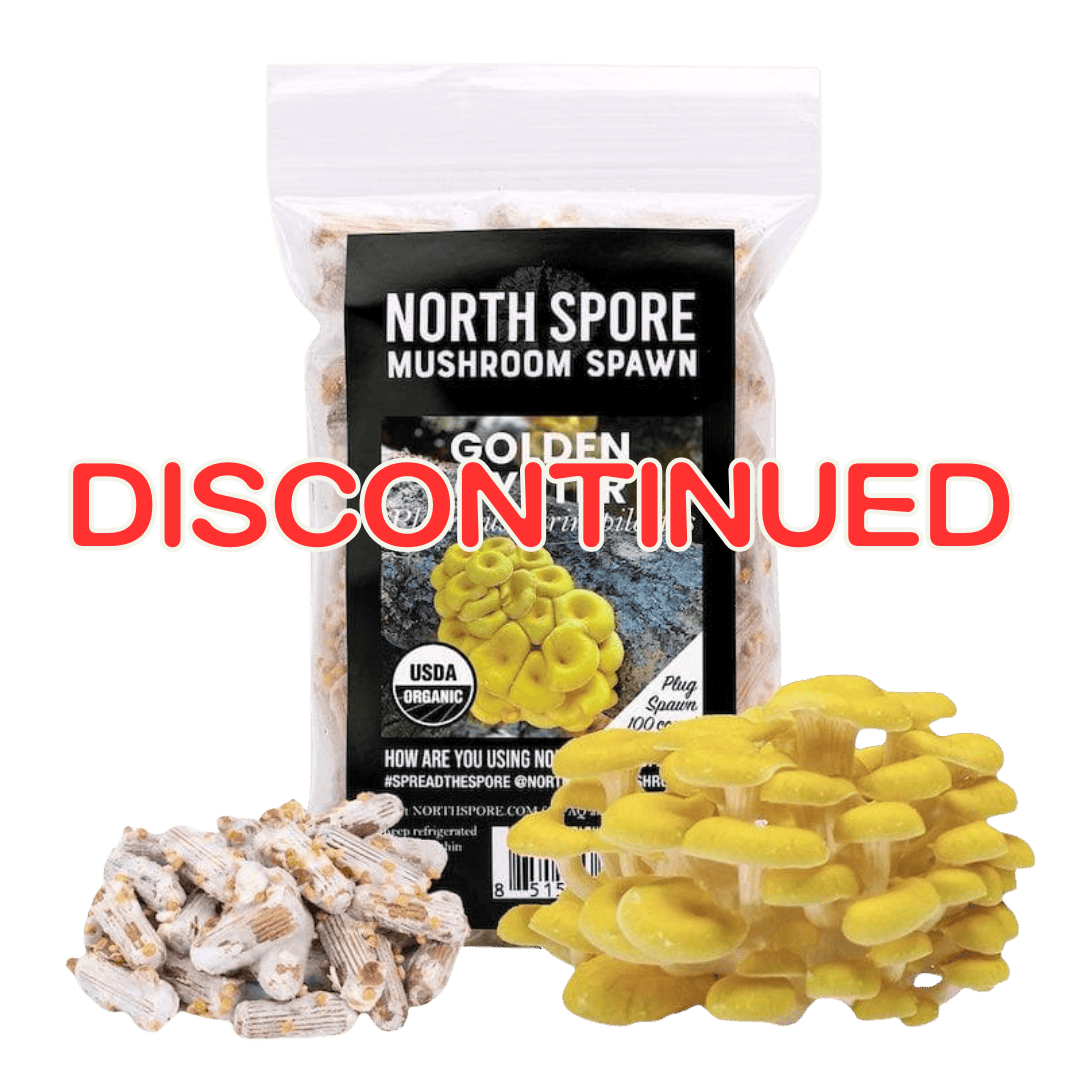
Credit: northspore.com
Safety And Hygiene
Growing mushrooms indoors is safe if you follow hygiene rules:
- Always sterilize substrate and tools.
- Don’t eat mushrooms if you see mold or discoloration.
- If unsure, throw away questionable mushrooms.
If you have allergies or respiratory issues, ventilate the growing area. Spores from mature mushrooms can cause sneezing or irritation.
Fact: Oyster mushrooms are not poisonous. But wild mushrooms can be dangerous. Only grow from store-bought spawn.
Extra tip: Never eat mushrooms from an unknown source. Mushroom poisoning can be serious, so always use trusted spawn and substrates.
Troubleshooting: What To Do When Things Go Wrong
Even with care, problems can happen. Here’s how to handle common issues:
- Mold appears: Remove affected substrate. Clean container. Start again. Mold often looks green, black, or pink. White fuzz is usually healthy mycelium.
- No mushrooms: Check temperature, humidity, and air holes. Try misting more. Make sure the substrate is fully colonized (all white) before fruiting.
- Small mushrooms: Use more spawn next time. Make sure substrate is moist. Also, increase air exchange during fruiting.
- Bad smell: This means contamination. Discard substrate. Healthy mushrooms smell earthy and pleasant.
- Yellowing substrate: Usually dryness. Mist with water and cover. If the substrate is very dry, soak it in water for a few hours.
Most problems are solved by improving cleanliness and adjusting water. Don’t panic—most issues are easy to fix.
Non-obvious insight: Sometimes, mushrooms grow very slowly if the substrate is too dense. Try mixing the substrate more loosely next time.
Environmental Impact And Sustainability
Oyster mushrooms are eco-friendly:
- They recycle waste (straw, coffee grounds, cardboard). Growing them at home reduces landfill.
- Low water use compared to vegetables. Mushrooms need only a few sprays a day.
- No pesticides or chemicals needed. Indoor growing is naturally pest-free.
Growing mushrooms indoors reduces your food footprint. You can compost used substrate and mushroom stems. This creates a circular system—food waste becomes new food.
Tip: Share extra mushrooms with friends or neighbors. It’s a great way to connect and reduce waste. Many people are surprised at how easy and tasty home-grown mushrooms are.
Extra example: Schools and community centers often use oyster mushroom kits to teach about sustainability and recycling.
Advanced Tips: Scaling Up
Once you succeed with a small batch, try larger setups:
- Use bigger containers (5–10 liters). This gives larger harvests, but needs more careful humidity control.
- Grow multiple varieties. Keep each in a separate container.
- Experiment with different substrates. Try mixing straw with sawdust, or adding bran for extra nutrients.
Larger setups need careful humidity control. Use a humidifier if your room is dry. More mushrooms means more evaporation.
Non-obvious insight: Many growers mix substrates (straw + coffee grounds) for better yields. Try blending materials for extra nutrients. Adding a handful of bran or wheat flour can speed up colonization but increases contamination risk, so only use if you can keep things clean.
Extra tip: Join online forums or local groups to share ideas, buy spawn in bulk, and learn from others’ mistakes and successes.
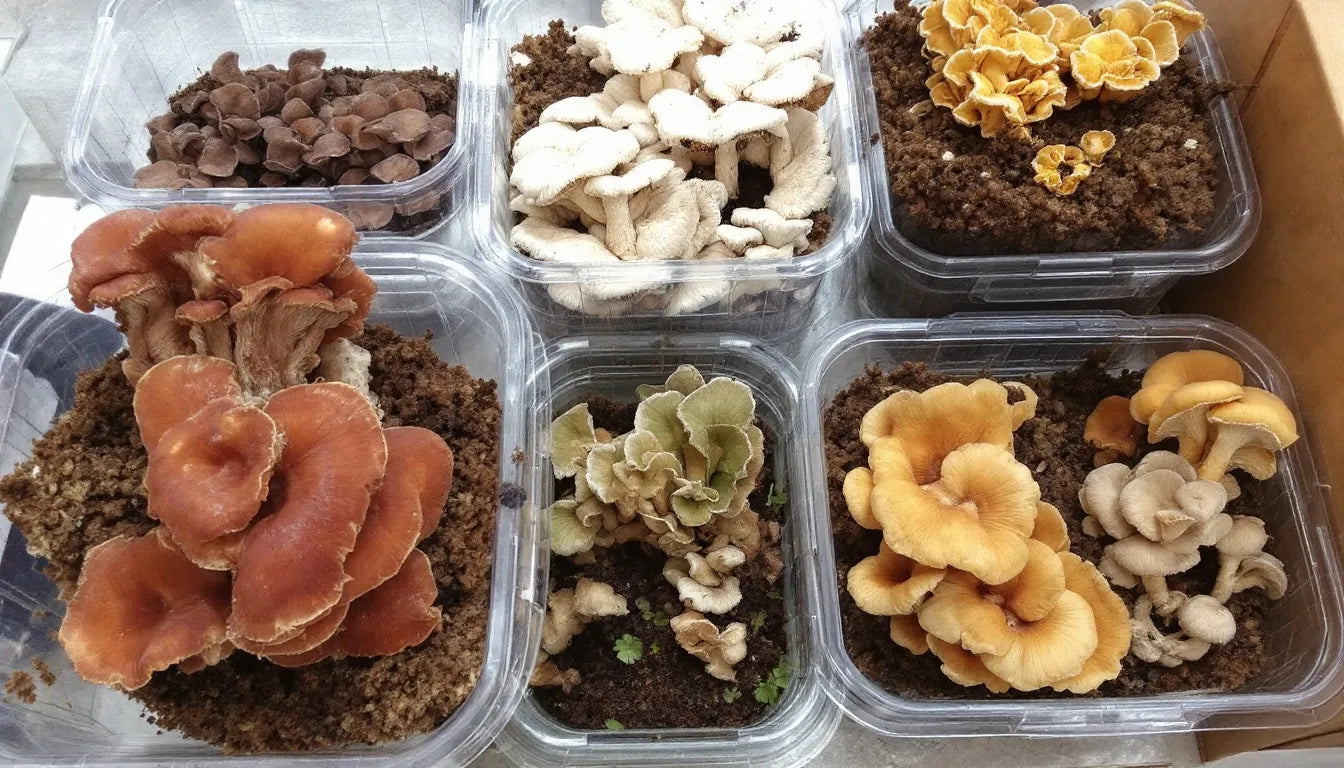
Credit: zombiemyco.com
Where To Buy Mushroom Spawn
Quality spawn is essential. Buy from trusted sources:
- Garden centers
- Online shops
- Local mushroom farms
Look for spawn labeled “certified” or “tested. ” Avoid wild or unknown sources. Ask sellers about the age of spawn—fresh spawn gives better results.
For more information about mushroom types and spawn sources, visit Wikipedia Oyster Mushroom.
Non-obvious tip: Some local farmers’ markets sell fresh oyster mushroom kits or spawn. Ask the seller for tips—they often have valuable local knowledge.
Frequently Asked Questions
What Is The Best Substrate For Oyster Mushrooms?
Straw is the easiest and most effective substrate for beginners. It’s cheap, easy to prepare, and gives high yields. Coffee grounds and cardboard also work well, especially if you want to recycle home waste. For bigger harvests, try hardwood sawdust, but prepare it carefully.
How Long Does It Take To Grow Oyster Mushrooms Indoors?
From setup to harvest, oyster mushrooms take about 10–20 days. Incubation takes 10–14 days, and fruiting (mushroom growth) takes 5–7 days. Some varieties grow faster, like pink oyster mushrooms. Cooler rooms may slow growth, while warmer rooms speed it up.
Can I Use Store-bought Mushrooms To Start Growing?
No. Store-bought mushrooms do not contain live mycelium needed to start a batch. You must buy mushroom spawn, which is specially prepared for growing. Growing from store-bought mushrooms is possible for some types, but not reliable for beginners.
Why Are My Mushrooms Not Growing?
Common reasons include low humidity, blocked air holes, contaminated substrate, or poor quality spawn. Check temperature and mist the substrate daily. If problems continue, try new spawn or substrate. Also, check if your substrate is too dry or too wet.
Is It Safe To Eat Mushrooms Grown Indoors?
Yes, as long as you use certified spawn and keep everything clean. Do not eat mushrooms if you see mold or strange colors. When in doubt, throw them out. Always wash hands and tools before harvest.
Growing oyster mushrooms indoors is a fun and simple way to enjoy fresh food and learn about nature. With the right tools, a clean workspace, and careful attention, you can harvest your own mushrooms in just a weekend. Start small, follow each step, and don’t worry if you make mistakes.
Each batch teaches you more. Oyster mushrooms are forgiving, tasty, and bring life to your home. If you’re ready for a new project, give mushroom growing a try—you may discover a new passion right in your kitchen.