Mushroom Photography Tips: Capturing Fungi In The Field And Lab
Photographing mushrooms is more than just a hobby for nature lovers. It’s a fascinating blend of art and science. Each species of fungi has a unique shape, color, and texture. Some look almost magical, with glowing caps or delicate stems.
Others are tiny and easy to miss. Whether you’re exploring a damp forest or working with samples under bright lab lights, photographing mushrooms can be deeply rewarding—and sometimes challenging.
Many beginners think mushroom photography is just point-and-shoot. But capturing the true beauty and detail of fungi requires more skill and planning than most expect. Mushrooms are often small, grow in dark, humid environments, and are sensitive to touch. Their surfaces can be shiny, sticky, or dull.
If you want to create photos that inspire and inform, you need to understand your tools, your subject, and the environment.
This guide will give you practical tips, professional techniques, and useful insights for photographing mushrooms both in the wild and in the lab. Whether you’re using a phone or a full-frame camera, you’ll find advice here that goes beyond the basics and helps you avoid common mistakes.
Let’s begin your journey into the world of mushroom photography.
Understanding Fungi: Why Photograph Mushrooms?
Mushrooms are not just pretty subjects. They are essential for forests and fields. Some species help trees grow. Others break down dead plants and recycle nutrients. By photographing mushrooms, you create a record of biodiversity. Detailed photos help scientists identify rare or new species.
They can also show how fungi change with seasons or climate.
Photographing mushrooms is also a way to connect with nature. It teaches patience and observation. You’ll start to notice patterns, colors, and shapes you never saw before. Even in cities, mushrooms can be found in parks, gardens, and hidden corners.
For teachers and students, mushroom photos make biology lessons more real and exciting.
Essential Equipment For Mushroom Photography
The right tools make a big difference. But you don’t need the most expensive gear to get great results.
Cameras
- Smartphones: Modern phones have excellent cameras. Some models offer macro modes that are perfect for close-ups.
- DSLRs and Mirrorless Cameras: These give you more control over focus, exposure, and lens choices. They work well in low light.
- Compact Cameras: Lightweight and easy to carry, but check if they have manual settings and a good macro mode.
Lenses
- Macro Lenses: Best for close-up shots. They capture fine details, like gills and spores.
- Standard Zoom Lenses: Useful for wider scenes, like groups of mushrooms or habitat context.
- Wide-Angle Lenses: Great for showing mushrooms in their environment.
Tripods
A stable tripod is almost essential. Mushrooms often grow in low light, so long exposures are common. Small tabletop or flexible tripods work well in the forest.
Lighting
- Natural Light: Soft, cloudy days are perfect. Hard sunlight can create harsh shadows.
- Portable LED Lights: Useful for filling in shadows or highlighting features.
- Reflectors: Even a piece of white paper can bounce light onto your subject.
- Flash Units: For lab shots, a ring flash or small external flash can reveal hidden details.
Accessories
- Kneeling Pad or Mat: Forest floors are wet and muddy.
- Tweezers or Brushes: Gently clean dirt or debris off mushrooms.
- Water Spray Bottle: Sometimes adds life to dry caps, but use sparingly.
- Scale or Ruler: For scientific photos, include a scale next to the subject.
- Notebook or App: Record location, date, and other notes.
Memory And Power
Bring extra memory cards and batteries. Cold and wet weather can drain power faster than you expect.
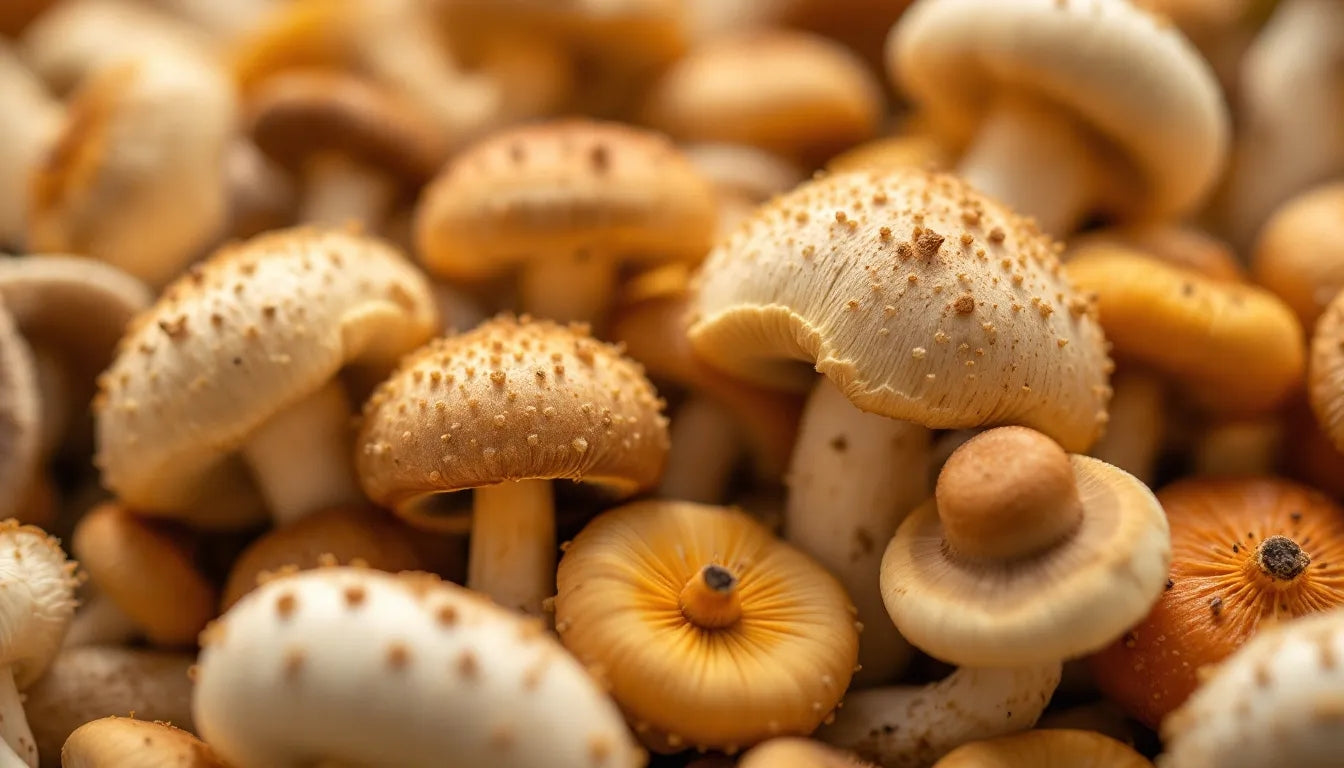
Credit: www.gorillagrowtent.com
Field Techniques: Photographing Mushrooms In Nature
Fieldwork brings surprises and challenges. Mushrooms are sensitive to touch and light. Here’s how to get the best results outdoors.
Finding Good Subjects
Mushrooms appear after rain. Look in shady, damp spots: under leaves, logs, or moss. Some are easy to spot—others hide well. Move slowly and scan the ground. Learn the basic shapes and colors of common fungi in your area.
Setting Up Your Shot
- Check the Surroundings: Remove sticks or leaves that distract from your subject, but avoid damaging the habitat.
- Work Low: Most mushrooms are close to the ground. Lie down or use a low tripod to get at their level.
- Choose the Best Angle: Side or back lighting can reveal gills and textures. Try several angles—some mushrooms look very different from above or below.
- Mind the Background: A messy background can ruin a great shot. Use your hand, a piece of paper, or natural leaves to create a soft, clean backdrop.
Lighting In The Field
Soft, even lighting is best. Overcast skies act like a giant softbox. If the light is too harsh, shade the mushroom with your body or an umbrella. For extra light, use a small LED or even a flashlight. Avoid shining light directly—bounce it for a softer effect.
Focusing And Depth Of Field
- Manual Focus: Autofocus can struggle with small subjects or cluttered scenes. Use manual focus for precision.
- Aperture Settings: A small aperture (high f-number) gives more depth of field, keeping the whole mushroom sharp. But too small can make the background busy. Try f/5.6 to f/11 for balance.
- Focus Stacking: Advanced photographers use this technique. Take several photos at different focus points, then blend them later. This creates a sharp image from top to bottom.
Dealing With Weather
Rain and fog can create mood. But water on your lens or camera is dangerous. Use a rain cover or plastic bag to protect your gear. Wipe droplets off the lens before each shot.
Capturing Habitat Context
Don’t only shoot close-ups. Wide shots show the mushroom’s environment. This helps with identification and tells a better story. Include logs, moss, or nearby plants.
Macro And Detail Shots
Get close to show gills, pores, or tiny insects living on the mushroom. Focus on the edge of the cap or the stem’s texture. Use a ruler or coin for scale if you want to document size.
Creative Tips
- Try shooting from below to show the gills against the sky.
- Use water drops to add sparkle.
- Play with composition—mushrooms with insects or other fungi can make interesting scenes.
Lab Photography: Capturing Fungi Under Controlled Conditions
Lab photography is important for identification, research, and teaching. The lab offers more control over light and background, but requires careful setup.
Preparing Your Subject
- Handle with Care: Mushrooms bruise easily. Use tweezers or gloves.
- Clean Gently: Remove dirt with a soft brush. For spore prints, cut the cap and place it on paper.
- Sectioning: For some studies, cut mushrooms to show inside structures.
Setting Up Your Lab Space
- Backgrounds: Use plain backgrounds—white, black, or blue work well. Paper, plastic, or velvet are good choices.
- Lighting: Position lights at different angles to reveal textures. Avoid direct overhead light—it creates flat images.
- Camera Mount: Use a stable tripod or copy stand. For microscopes, use an adapter for your camera or phone.
Photographing Small Details
- Stereo Microscopes: Essential for spores or tiny fungi. Take several shots at different focus levels if needed.
- Macro Rails: Allow precise movement for focus stacking.
- Scale: Always include a ruler or grid for scientific accuracy.
Managing Reflections And Shadows
Glossy mushrooms reflect lab lights. Use diffusers, such as tracing paper or softboxes. Adjust the angle to minimize glare. Shadows can help show form, but avoid harsh, black areas.
Color Accuracy
- White Balance: Set your camera’s white balance to match the lighting. Mushrooms come in many shades; color accuracy helps with identification.
- RAW Format: Shoot in RAW if possible. You can adjust colors later without losing detail.
Documenting Spore Prints
Spore prints are key for identification. Photograph the print with the mushroom cap and a scale. Use side lighting to highlight the pattern.
Composition And Artistic Choices
Mushroom photography is not just about documentation. It’s also about creativity.
Framing The Subject
- Use the rule of thirds to place mushrooms off-center.
- Lead the viewer’s eye with lines, like roots or fallen branches.
- Show relationships: Large and small mushrooms together, or fungi with insects.
Playing With Depth
- Blur the background to make the mushroom stand out.
- Include foreground elements for depth.
- Use focus stacking for sharpness from cap to ground.
Colors And Textures
Highlight the unique colors—reds, purples, yellows. Wet mushrooms look different from dry ones. Capture textures: smooth, warty, or scaly surfaces.
Storytelling
A single mushroom can be beautiful, but a group can tell a story. Show life stages: young buttons, mature caps, decaying remains. Include evidence of animal activity—nibbled stems or footprints.
Post-processing: Enhancing Your Mushroom Images
Editing is the final step. It can turn a good photo into a great one, but it should never mislead.
Basic Adjustments
- Crop for better composition.
- Adjust Exposure to bring out details.
- Sharpen the image gently, especially for macro shots.
- Correct Colors to match reality.
Advanced Techniques
- Focus Stacking: Combine images for full sharpness.
- Noise Reduction: Low light can create grain. Use software to clean up images.
- Cloning Tool: Remove dust spots, but don’t erase natural features.
Ethical Editing
Never add or remove elements that change the truth. If you use images for science, keep editing to a minimum and record any changes.
Common Mistakes And How To Avoid Them
Even experienced photographers make errors. Here’s what to watch out for:
- Ignoring the Background: Clutter can spoil a shot. Take time to clean up.
- Overexposed Caps: Bright mushroom tops lose detail. Check your histogram and reduce exposure.
- Shallow Focus: Only part of the mushroom is sharp. Use a higher f-number or focus stack.
- Touching Mushrooms Too Much: Some species are delicate or toxic. Minimize handling.
- Not Including Scale: Without a reference, size is impossible to judge.
- Poor Lighting: Harsh or uneven light hides detail. Use diffusers or shoot on cloudy days.
- Shooting Only from Above: Side or low angles often work better.
- Not Taking Enough Shots: Conditions change quickly. Take several shots with different settings.
- Lack of Documentation: Record location and date for every photo, especially for rare finds.
- Forgetting Safety: Forests can be slippery, and some mushrooms are dangerous. Wear gloves and sturdy shoes.
Data Table: Field Vs. Lab Mushroom Photography
Here’s a quick look at how field and lab photography compare:
| Aspect | Field Photography | Lab Photography |
|---|---|---|
| Lighting | Natural, often variable | Controlled, consistent |
| Background | Natural, sometimes cluttered | Plain, chosen by photographer |
| Subject Condition | In habitat, sometimes dirty | Cleaned, can be manipulated |
| Equipment Needed | Portable, rugged | Specialized, stable |
| Purpose | Ecology, storytelling | Identification, research |
Technical Settings: Camera Setup For Mushroom Photography
Knowing your camera settings is as important as your lens choice. Here’s a summary for quick reference:
| Setting | Recommended Value | Why |
|---|---|---|
| Aperture | f/5.6 to f/11 | Good depth of field, sharpness |
| ISO | 100–400 | Less noise, better quality |
| Shutter Speed | 1/30 sec or slower (with tripod) | Allows enough light in low conditions |
| White Balance | Cloudy/Custom | Accurate colors |
| Focus Mode | Manual | More precise, especially for macros |
| File Format | RAW | Better editing flexibility |
Safety And Ethics In Mushroom Photography
Safety comes first. Many mushrooms are toxic. Some are rare and protected by law. Here are important guidelines:
- Don’t Eat Wild Mushrooms: Never taste or smell unknown fungi. Many are poisonous.
- Minimize Disturbance: Don’t pick or trample mushrooms unless for research with permission.
- Leave No Trace: Carry out all trash and avoid damaging plants or soil.
- Respect Regulations: Some parks ban collecting mushrooms. Always check rules.
- Share Knowledge: If you find rare species, report them to local mycologists or nature groups.
Practical Insights Most Beginners Miss
Many new mushroom photographers focus only on the mushroom itself. But context is key. The plants, soil, and even the weather matter. A mushroom growing in moss tells a different story than one on a log. Always take at least one photo showing the habitat.
Another common oversight is timing. Mushrooms can look very different at dawn, noon, or dusk. Early morning often has dew or fog, adding atmosphere. Some species open or change color during the day. Visit the same spot at different times for a unique series.
Inspiring Examples: Notable Mushroom Photographers
Many photographers have made fungi their specialty. For inspiration, look at the work of Steve Axford. His images highlight the beauty and diversity of mushrooms around the world. Another excellent resource is the Fungal Diversity Survey (FunDiS), which connects photographers and scientists.

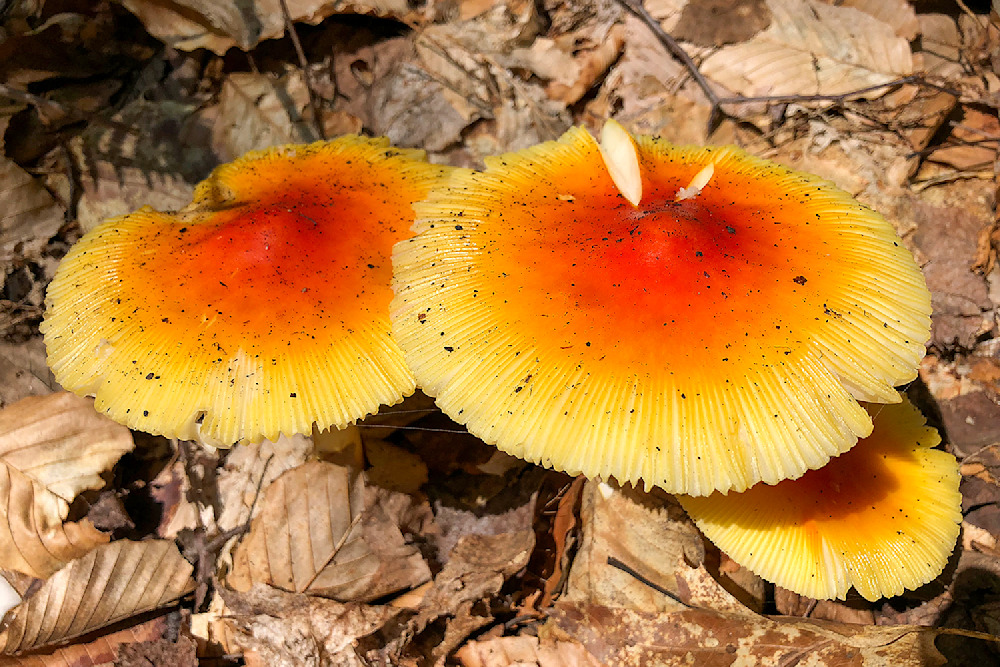
Credit: www.eltimpano.org
Sharing And Using Your Photos
Your photos have value beyond your computer. Upload images to citizen science platforms like iNaturalist or Mushroom Observer. These help scientists map and identify fungi. Share on social media to inspire others, but always credit locations and species if known.
If you want to publish or sell your photos, learn about copyright. Watermark your images and keep high-resolution originals safe.
Troubleshooting: When Things Go Wrong
Problems happen, even to experts. Here’s how to solve common issues:
- Blurry Images: Use a tripod, remote shutter, or timer. Increase ISO if needed.
- Color Casts: Adjust white balance, or fix colors in post-processing.
- Mushroom Moves in Wind: Shield with your body or wait for calm moments.
- Can’t Get Close Enough: Use extension tubes or close-up filters if you don’t have a macro lens.
- Lens Fog: Keep gear in a sealed bag when moving from cold to warm places. Let it adjust slowly.
Credit: www.robbiegeorgephotography.com
Advanced Techniques For Enthusiasts
After you master the basics, try these advanced ideas:
- Time-Lapse: Show mushrooms growing or decaying over hours or days.
- UV Photography: Some fungi glow under ultraviolet light.
- High Magnification: Use microscope adapters to photograph spores or cells.
- Panorama Stitching: Combine several images for wide scenes of mushroom colonies.
Community And Learning Resources
The world of mushroom photography is friendly and supportive. Join local mycology clubs, or online forums. Attend workshops or join field trips. Learning with others speeds up your progress and leads to new friendships.
For more technical details, the British Mycological Society offers workshops and resources for all levels. You can also find excellent guides and research at Wikipedia.
Frequently Asked Questions
How Do I Avoid Blurry Mushroom Photos In Low Light?
Use a tripod for stability and set your camera’s timer or use a remote shutter. If your camera allows, raise the ISO slightly, but not too high to avoid noise. Longer exposures work if the camera is steady and there’s no wind.
What Is The Best Time Of Day To Photograph Mushrooms?
Early morning is often best. The light is soft, there’s less wind, and you might capture dew or mist. Avoid harsh midday sun, which can create strong shadows and overexposed spots.
Can I Use My Smartphone For Mushroom Photography?
Yes, many modern smartphones have excellent macro modes. Use a small tripod or steady surface, and tap to focus. For extra detail, consider clip-on macro lenses designed for phones.
How Can I Identify The Mushroom I Photographed?
Take several photos: from above, below, and the side, including the habitat. Include a size reference. Compare with field guides or use citizen science apps like iNaturalist. Never rely on one photo for identification if you plan to eat wild mushrooms.
Are There Any Legal Issues With Photographing Mushrooms?
In most places, you can photograph mushrooms freely. But collecting or disturbing them is sometimes restricted, especially in protected areas. Always check local rules and respect wildlife regulations.
Mushroom photography is a journey that blends nature, science, and art. With patience and practice, you’ll create images that not only look beautiful but also deepen your understanding of the fascinating world of fungi. Whether in a quiet forest or a busy lab, each photo tells a story worth sharing.