
Building a mushroom fruiting chamber can seem difficult and expensive if you’re just starting. But with the right guidance, you can create an efficient setup with simple materials and a bit of smart planning. If you want to grow fresh mushrooms at home without spending much, this guide will help you step by step.
You will learn not only how to build a budget fruiting chamber but also how to make it work well, avoid common mistakes, and get great results even as a beginner.
Mushroom growing is becoming more popular worldwide. People enjoy the taste, health benefits, and fun of watching their own mushrooms grow. But many give up because they think equipment is too costly or complicated. In reality, you can start with basic tools and household items.
You just need to understand which features matter and what you can skip.
This article will walk you through everything: choosing the right chamber type, gathering materials, construction, maintaining the right conditions, and troubleshooting. Even if your English is not perfect, you will find this guide simple, clear, and helpful. By the end, you’ll have all the knowledge you need to build a mushroom fruiting chamber that fits your budget and your space—and you’ll know how to get the most out of it.
Why A Fruiting Chamber Is Important
If you want to grow mushrooms, the fruiting chamber is where the most exciting part happens: the mushrooms appear and grow. This chamber creates the right environment for mushroom “pins” to develop into full mushrooms.
Without a proper chamber, your mushrooms may dry out, get contaminated, or not grow at all. The chamber controls three key things:
- Humidity: Mushrooms need moist air to grow big and healthy.
- Fresh Air: Good airflow stops mold and helps mushrooms breathe.
- Light: Some mushrooms need low light to trigger fruiting.
Even if you have the best mushroom spawn or substrate, you won’t get good results without a proper fruiting chamber. If you want to avoid disappointment, don’t skip this step.
Types Of Budget Mushroom Fruiting Chambers
There are several ways to build a fruiting chamber without spending a lot. The best design for you depends on your space, the type of mushrooms, and how many you want to grow. Let’s look at the most popular low-cost options.
1. Shotgun Fruiting Chamber (sgfc)
The Shotgun Fruiting Chamber is a favorite for beginners. It is cheap, easy to build, and works well for many kinds of mushrooms, especially oyster and psilocybe types.
How it works:
A plastic box is drilled with many small holes on all sides. The bottom holds wet perlite to keep humidity high. Air comes in through the holes, giving mushrooms fresh air.
Pros:
- Very cheap
- Good humidity and airflow
- Easy to clean
Cons:
- Not for large amounts
- Needs misting 1-2 times per day
2. Monotub Chamber
The MonoTub is similar to the SGFC but uses fewer holes and often has some covered with filter material (like polyfill). This helps keep out dust and mold.
How it works:
A large plastic tub with holes on the sides. Some holes are stuffed with polyfill to filter the air. Substrate is placed directly inside the tub.
Pros:
- Holds more substrate (more mushrooms)
- Less frequent misting
- Good for bulk growing
Cons:
- Slightly more complex to set up
- Needs careful hole placement
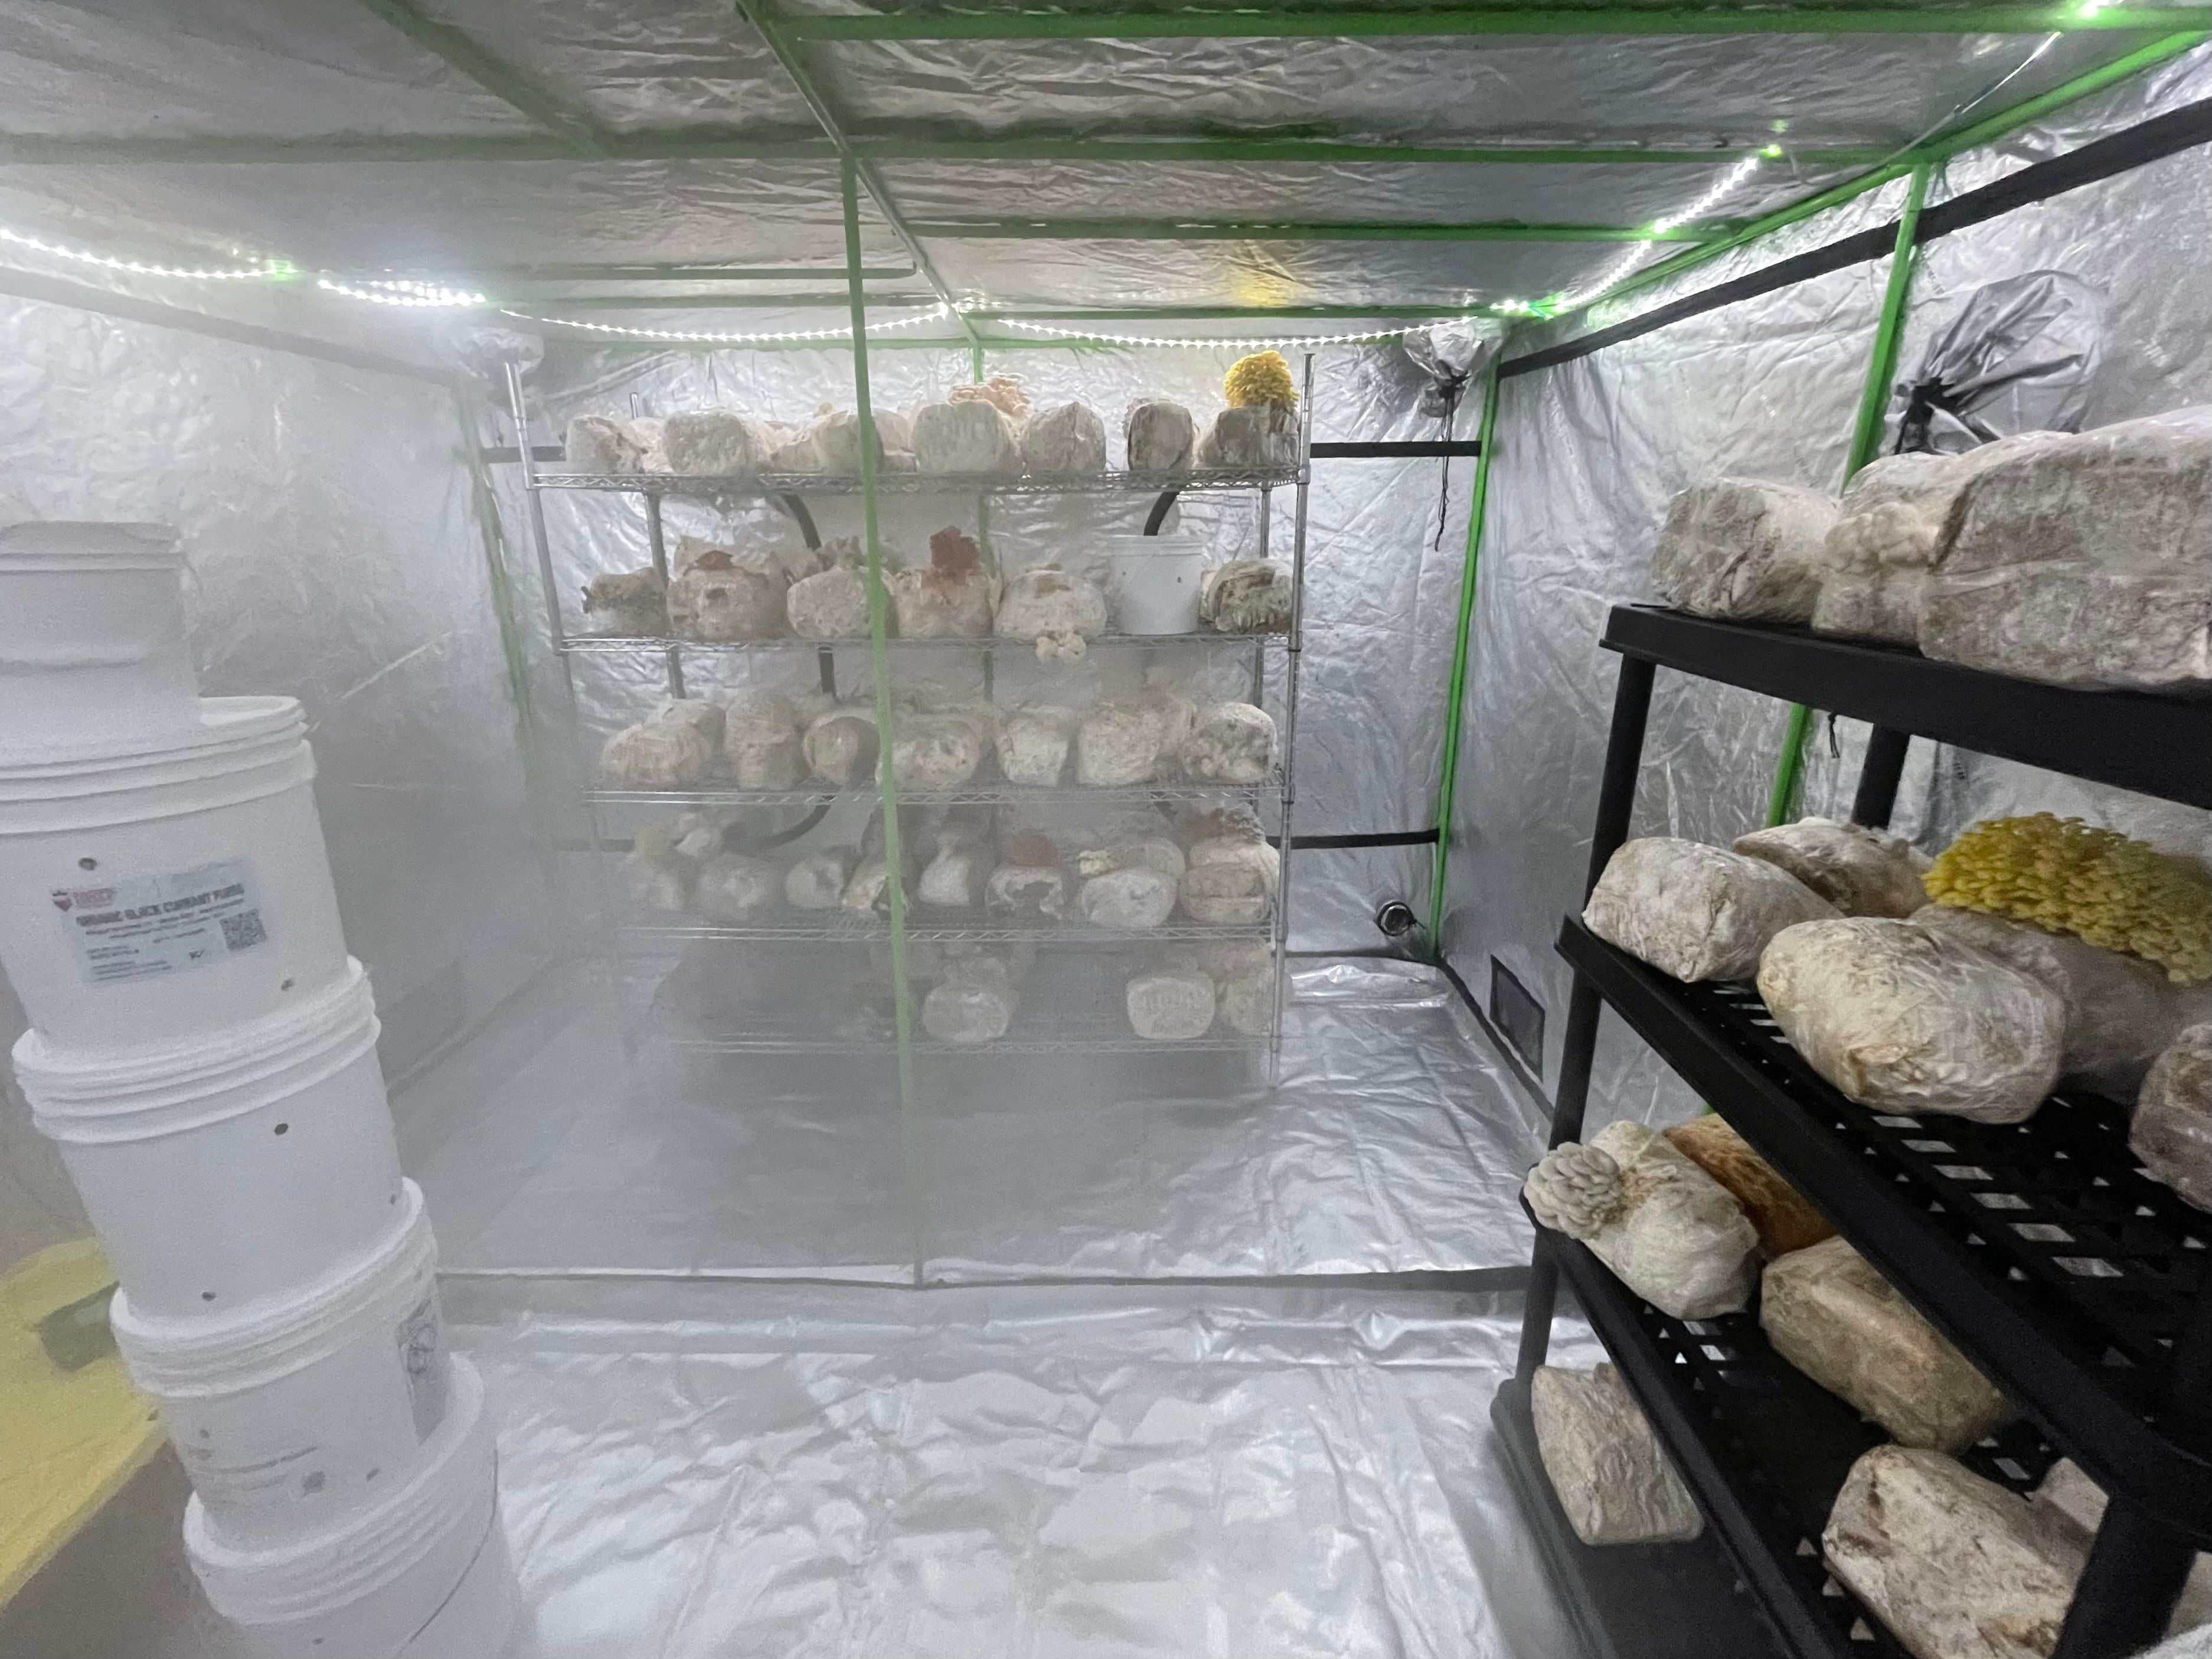
3. Mini Greenhouse Tent
This is a small, zip-up plastic greenhouse shelf that stands upright. It is more expensive than a tub but still affordable if you want to grow a lot.
How it works:
Shelves hold trays or bags of substrate. A small humidifier is used inside, and the sides zip open for airflow.
Pros:
- Fits many mushroom trays
- Easy to add automation (fans, humidifiers)
- Good for advanced growers
Cons:
- Costs more than a tub
- Needs space and electric humidifier
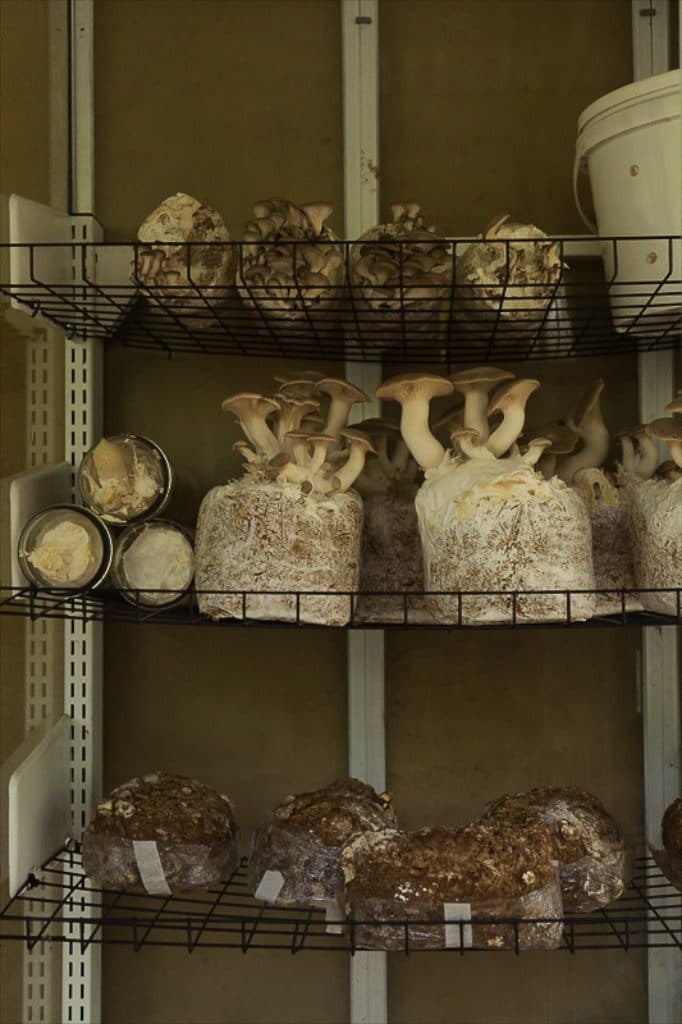
4. Repurposed Items
You can use things like old aquariums, large storage bins, or even big water bottles. The key is to adjust them so they hold humidity and let some fresh air in.
Pros:
- Even cheaper if you already have the item
- Good for very small grows
Cons:
- May need creative work to fit mushroom needs
- Harder to clean if not plastic
Credit: circularharvest.ca
Choosing The Right Design For Your Needs
You might wonder: which chamber is best for me? To decide, ask yourself:
- How many mushrooms do you want to grow?
- Do you have more time (for misting) or want automation?
- Is space limited in your home?
- What is your total budget?
Here is a quick comparison to help:
| Chamber Type | Cost Range (USD) | Effort Needed | Batch Size | Automation Possible |
|---|---|---|---|---|
| Shotgun Fruiting Chamber | $10–$25 | Low | Small | No |
| MonoTub | $15–$30 | Medium | Medium | Limited |
| Mini Greenhouse Tent | $35–$60 | Medium | Large | Yes |
| Repurposed Item | $0–$20 | Varies | Very Small | No |
Most beginners start with a shotgun fruiting chamber or a monotub. If you want to experiment and save the most money, try using what you already have at home.
Gathering Materials: What You Need (and What You Don’t)
You don’t need to buy expensive equipment. Many items can be found at home or bought cheaply at hardware or dollar stores.
Main Materials
- Plastic storage bin (clear, 50–70 liters is ideal)
- Drill or screwdriver (to make holes)
- Perlite (a natural volcanic rock, keeps humidity high)
- Spray bottle (for misting water)
- Polyfill (optional, for monotub holes)
- Aluminum foil or plastic trays (for substrate)
- Small fan (optional, for extra airflow)
- Hygrometer (optional, measures humidity)
If you want to make a mini greenhouse:
- Plastic zip-up greenhouse tent (often sold for seedlings)
- Small ultrasonic humidifier
- Extension cord
What To Avoid
- Wood or cardboard boxes (hard to clean, rot easily)
- Glass (heavy and can break)
- Expensive digital gear (not needed for small grows)
Tip: If you cannot find perlite, you can use wet vermiculite or even wet towels in an emergency, but perlite works best.
Credit: www.milkwood.net
Step-by-step: Building A Shotgun Fruiting Chamber
Let’s go through the process of making the most common budget chamber: the shotgun fruiting chamber. This example will help you understand the main steps, even if you choose a different design.
Step 1: Prepare The Plastic Bin
Choose a clear plastic bin, at least 30–40 cm tall, so mushrooms have room to grow. Wash it with hot water and soap to remove dust or oil. Rinse well.
Step 2: Drill Air Holes
Use a drill to make holes (6–8 mm wide) all around the bin. Place holes about 5 cm apart on all four sides, the lid, and the bottom. Don’t worry if the holes are not perfect—just make sure there are enough.
Safety tip: Wear eye protection. If you don’t have a drill, a hot screwdriver can also make holes (heat it over a stove flame).
Step 3: Add Perlite
Wash the perlite in a strainer to remove dust. Put a 5–8 cm layer in the bottom of the bin. Pour clean water over the perlite until it is wet but not floating in water (drain excess).
Perlite will slowly release water into the air, keeping humidity high.
Step 4: Place Your Substrate
Put your mushroom substrate (in trays, bags, or blocks) on top of small pieces of foil or trays. This keeps them from touching the wet perlite.
Leave some space between blocks for air to flow.
Step 5: Set Up The Location
Place your chamber in a spot with indirect sunlight (not direct sun, which can overheat and dry out mushrooms). Avoid cold drafts or very hot rooms.
Step 6: Monitor And Mist
Mushrooms like 85–95% humidity. Use a spray bottle to mist the inside walls 1–2 times a day. If you see water droplets, humidity is high enough.
Fan the inside with the chamber lid for 5–10 seconds to bring in fresh air after misting.
Pro tip: Use a cheap hygrometer to check humidity, but don’t stress if you don’t have one. Look for visible droplets, and watch for dry or shriveled mushrooms.
Building A Monotub: Bulk Growing On A Budget
If you want to grow larger amounts, a monotub is a great next step. It’s not much harder but lets you produce more mushrooms in one chamber.
Step 1: Choose A Large Bin
Get a big, clear plastic tub (60–90 liters works well). Clean it thoroughly.
Step 2: Make Side Holes
Drill 4–8 holes, about 5–8 cm in diameter, around the sides of the tub (about 10–15 cm above the bottom). These are for fresh air.
Stuff each hole with polyfill (cheap pillow stuffing) to filter dust and keep humidity in.
Step 3: Prepare Substrate
For monotub growing, you can put the colonized substrate directly in the tub, about 8–12 cm deep. Level it gently.
Step 4: Cover And Incubate
Put the tub lid on. Keep the chamber closed for 7–14 days while the mushrooms start to pin (tiny mushroom heads appear). Open briefly each day for fresh air.
Step 5: Fruiting
Once pins appear, open the tub for a few minutes 2–3 times daily for fresh air. Mist if the surface looks dry.
Step 6: Harvest
Mushrooms grow fast in a monotub. Harvest when the cap opens but before it drops spores.
Making A Mini Greenhouse Chamber
If you want to grow many mushrooms or automate humidity, a mini greenhouse chamber is a good choice. It costs more but is still much cheaper than commercial setups.
Step 1: Buy A Small Greenhouse
Buy a plastic zip-up greenhouse (often sold for seed starting) with 3–4 shelves. These are usually 1. 5–2 meters tall and 0. 5 meters wide.
Step 2: Set Up Shelves
Wipe the shelves clean. Place your mushroom trays or bags on each shelf, leaving space for air to move.
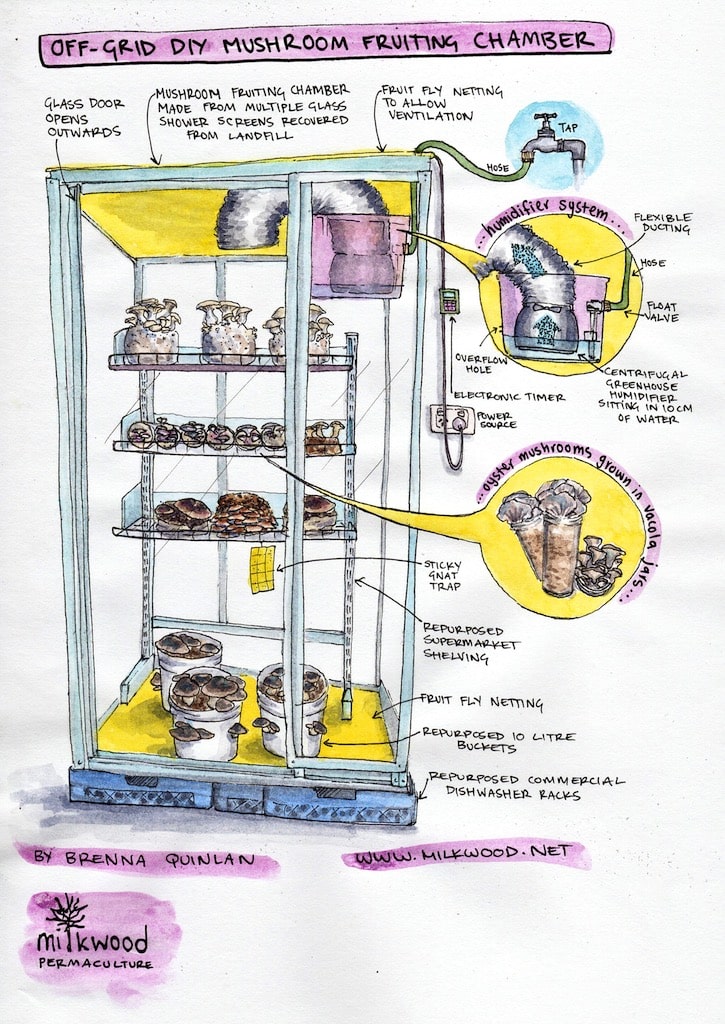
Step 3: Add Humidifier
Put a small ultrasonic humidifier on the bottom shelf. Run a plastic tube from the humidifier to the top to spread mist.
Set the humidifier on a timer (1–5 minutes every hour is common). Too much mist can cause water to pool.
Step 4: Airflow
Open the greenhouse zipper slightly or install a small fan (on a timer) for airflow. This prevents mold and helps mushrooms breathe.
Step 5: Light
Place the greenhouse near a window for natural light, or use a small LED grow light for 12 hours per day.
Step 6: Maintenance
Check daily for mold and water pooling. Adjust misting and fans as needed.
Key Conditions For Mushroom Fruiting Chambers
To succeed, you must control a few key conditions. Even with a simple chamber, these basics matter most.
Humidity
Most mushrooms fruit best at 85–95% humidity. Without enough moisture, mushrooms stay small or dry out. Too much, and mold can grow.
- Mist walls of the chamber, not the mushrooms directly.
- Watch for droplets on the walls as a sign of good humidity.
- If you see puddles, reduce misting.
Fresh Air
Mushrooms “breathe out” carbon dioxide. Without fresh air, they grow long, thin, and weak (called “fuzzy feet” or “leggy stems”).
- Open the chamber or fan it 2–3 times daily.
- In a greenhouse, use a small fan or leave zippers partly open.
- Too much airflow can dry out mushrooms—balance is key.
Light
Most mushrooms need some light to fruit but not direct sunlight.
- Place the chamber near a window with indirect light.
- If using artificial light, 12 hours on/12 hours off is ideal.
- Avoid strong, hot light, which can kill mushrooms.
Temperature
Each mushroom species has its favorite temperature. Most common types like oyster or button mushrooms grow well at 18–24°C (65–75°F).
- Too cold: Mushrooms grow slowly.
- Too hot: Higher chance of contamination.
Tip: Don’t obsess over perfect numbers. As long as you are close, most mushrooms will fruit.
Automation Tricks For Low-cost Chambers
You don’t need expensive gear, but some small upgrades can make life easier and improve yields.
Easy Automation Ideas
- Timer for humidifier: In a greenhouse, a cheap timer can turn a humidifier on and off.
- USB fan: Small USB fans can improve airflow. Set them on a timer for a few minutes every hour.
- LED strip light: A basic white LED strip (set to 12 hours per day) can help trigger fruiting.
- Remote temperature/humidity sensor: Modern wireless sensors are cheap and let you check the chamber without opening it.
Watch out: Too much automation can make things more complicated. Start simple and add devices only if you need them.
Cleaning And Maintenance
A clean chamber is key to success. Contaminants like mold or bacteria can ruin your crop.
Cleaning Steps
- Wash bins and tools with hot, soapy water before use.
- Wipe down with diluted bleach (1: 10 bleach to water) if you see any mold.
- Remove old mushroom substrate quickly after harvest.
- Let the chamber dry out between grows to kill mold.
Extra tip: Don’t use strong chemicals during fruiting, as they can hurt mushrooms.
Credit: www.milkwood.net
Common Mistakes And How To Avoid Them
Many beginners make the same errors. Here’s how to dodge the most common problems:
1. Not Enough Fresh Air
If mushrooms look tall, thin, or fuzzy at the base, you need more airflow. Open the lid more often or add extra holes.
2. Letting The Chamber Dry Out
If mushrooms stop growing or shrink, check the perlite and mist more often. Re-wet the perlite if needed.
3. Too Much Water
If you see puddles or lots of mold, reduce misting and airflow. Perlite should be damp, not soaked.
4. Dirty Equipment
Always clean your chamber and tools between grows. Even a little dirt can cause contamination.
5. Wrong Temperature
If your room is too hot or cold, move the chamber to a better spot. Mushrooms are sensitive to big temperature swings.
Non-obvious insight: The chamber does not need to be airtight! In fact, a little leakiness is good because mushrooms need oxygen.
Another insight: Always check the surface of the substrate for mold. White fuzzy growth is usually mycelium (good), but green, black, or orange is bad.
Troubleshooting: Fixing Problems
Even with care, you might face issues. Here’s how to solve the most common ones.
Mushroom Pins Not Forming
- Check if humidity is high enough (mist more if needed).
- Make sure there is some light.
- Are temperatures in the right range?
Mold Or Contamination
- Remove affected blocks immediately.
- Clean chamber with bleach.
- Increase airflow and reduce misting.
Slow Growth
- Check temperature (move to a warmer or cooler spot).
- Make sure the substrate was fully colonized before fruiting.
Mushrooms Stop Growing Suddenly
- Usually from dryness or poor air. Mist and fan more often.
- Check for contamination at the base of the mushrooms.
Advanced Tips For Bigger Harvests
Once you master the basics, try these tricks for more mushrooms:
- Layer perlite and water: For longer lasting humidity, add a second layer of perlite with water in the bottom of the chamber.
- Use a water bottle humidifier: Poke holes in a water bottle, fill with water, and place in the chamber for slow humidity release.
- Rotate trays: Move trays to new spots each day so all get equal light and air.
- Harvest just before full cap opening: This gives the best taste and shelf life.
- Keep a grow log: Write down temperature, humidity, and any issues to learn for next time.
Real-world Examples
Many home growers share their results online. For example, a grower in the UK built a shotgun fruiting chamber for under £15, using a recycled storage box, perlite, and a drill. She harvested over 1 kg of oyster mushrooms in her first run.
In the US, a beginner used a large water jug cut in half, with wet towels for humidity. He grew a small batch of lion’s mane mushrooms on his kitchen counter, proving you can start with almost nothing.
How To Scale Up When You’re Ready
When you feel confident, you can expand your mushroom growing without spending much more.
- Add more chambers: Each bin or greenhouse can be a new batch.
- Try different mushrooms: Oysters, shiitake, and lion’s mane all work well in home chambers.
- Automate with timers and humidifiers: Especially useful if you want to grow more, or can’t check the chamber often.
Important: Don’t try to grow too much at once. Start small, learn, then scale up.
Keeping Costs Low: Where To Save And Where To Spend
You can save money by using recycled bins, making your own polyfill, and finding free trays. Spend a little more on:
- Quality perlite (lasts a long time)
- A reliable spray bottle
- Basic cleaning supplies
Avoid buying expensive “mushroom growing kits” unless you want to pay for convenience. Most of the time, you can build better for less.
Safety Tips For Mushroom Growing
- Always wash your hands before handling the chamber.
- Never eat mushrooms unless you are 100% sure of the type.
- If you see mold (not white mycelium), throw out the affected block.
- Clean up spills quickly to prevent slips and contamination.
Useful Resources
For more technical details or advanced growing, check reliable sources like the Wikipedia Mushroom Cultivation page. It offers diagrams, species info, and more.
Frequently Asked Questions
What Is The Cheapest Way To Build A Fruiting Chamber?
The cheapest method is using a recycled clear plastic bin (like an old storage box), drilling holes in it for airflow, and adding a layer of wet perlite for humidity. You can often find bins at thrift stores or use ones you already have.
This setup costs as little as $10–15 and works for most beginner mushroom projects.
How Do I Keep Humidity High In My Chamber?
Use a layer of wet perlite or vermiculite in the bottom of the chamber. Mist the walls with water 1–2 times daily. For larger setups, a small ultrasonic humidifier on a timer helps keep humidity steady. Always watch for water droplets on the walls—they show the chamber is humid enough.
Can I Use A Fish Tank Or Aquarium As A Fruiting Chamber?
Yes, but glass tanks are heavy and harder to move and clean. If you use an aquarium, make sure to add airflow holes and use perlite for humidity. Plastic bins are usually easier for beginners, but an aquarium can work in a pinch.
How Do I Know If My Mushrooms Are Getting Enough Fresh Air?
If your mushrooms grow tall, thin, or have fuzzy stems, they need more fresh air. Open the chamber more often or add extra holes. A small fan can help in larger chambers, but don’t let the chamber dry out.
What Mushrooms Are Best For Beginners Using A Budget Chamber?
Oyster mushrooms are the easiest and most forgiving. They grow fast, resist contamination, and do well in simple fruiting chambers. Lion’s mane and button mushrooms also work but may need more careful humidity and temperature control.
—
You now have a clear, complete guide to building your own mushroom fruiting chamber on a budget. Start small, experiment, and enjoy the satisfaction of harvesting fresh mushrooms right at home. Remember: success comes from a clean setup, careful observation, and learning from each grow. Good luck and happy growing!