
Growing mushrooms at home or on a larger scale can be both rewarding and challenging. One of the main difficulties every grower faces is mushroom contamination—especially mold. While mushrooms themselves are fungi, they are highly sensitive to competing molds and bacteria. A single contaminated batch can destroy weeks of effort, waste resources, and pose health risks. Learning how to identify, prevent, and deal with contamination is not just useful—it’s essential.
If you’re new to mushroom cultivation, mold can feel mysterious and unstoppable. Even experienced growers sometimes get caught off guard by a sudden outbreak. This guide will break down what mold contamination looks like, why it happens, and how you can stop it before it starts.
You’ll get practical advice, clear identification tips, and some lesser-known insights that can save your grow. By the end, you’ll be better prepared to keep your mushrooms healthy and your yields high.
Understanding Mushroom Contamination
Mushroom contamination occurs when unwanted microorganisms—mainly molds, bacteria, or yeasts—invade your growing environment. The most common culprits are molds, which spread quickly and outcompete your mushrooms for nutrients. When mold takes hold, it can ruin your substrate, stunt growth, and produce toxins that make mushrooms unsafe to eat.
Many beginners think contamination only happens from dirty hands or tools, but contamination can come from the air, water, substrate, or even the mushroom spores themselves. Even experienced growers sometimes miss the early signs because some molds look similar to mushroom mycelium at first.
Knowing the main types of contaminants and how they behave is the first step to fighting back.
Why Mold Contamination Is So Dangerous
Molds aren’t just unsightly—they pose real risks. Some molds produce mycotoxins that can cause allergic reactions, respiratory issues, or poisoning if you eat contaminated mushrooms. Mold can also spread invisibly through spores, so a small problem can become a big one overnight. If you’re selling or sharing your mushrooms, even one batch of contaminated mushrooms can damage your reputation.
There’s also the hidden cost: contaminated grows waste your time, money, and energy. For commercial growers, this can mean lost income and even legal problems. For hobbyists, it’s simply frustrating and discouraging. That’s why prevention and early detection matter so much.
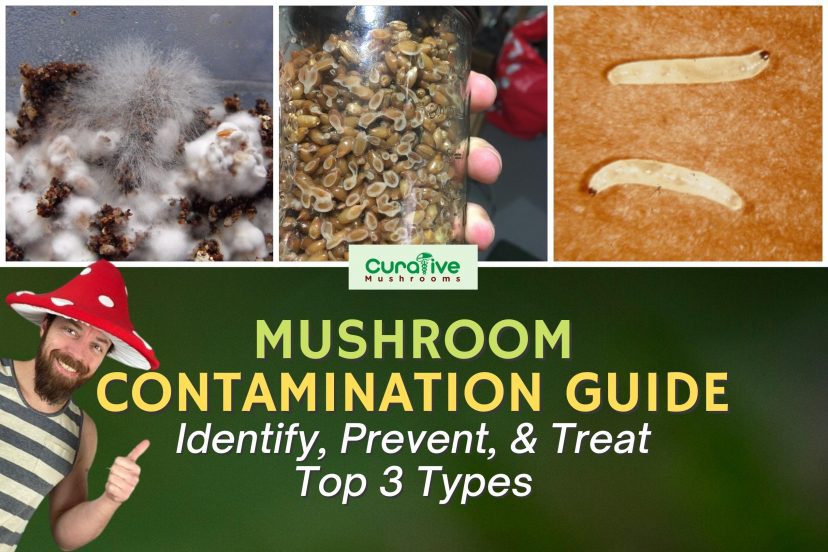
Credit: blog.curativemushrooms.com
The Life Cycle Of Mold In Mushroom Cultivation
Understanding how mold invades and spreads can help you stop it. Mold spores are everywhere—in the air, on surfaces, and even inside your grow room. When they land on a suitable surface with enough moisture and nutrients, they germinate and grow. In mushroom cultivation, the substrate (the material you grow mushrooms on) provides plenty of food and water for both mushrooms and molds.
The typical cycle is:
- Spore Landing: Mold spores enter the grow area and land on the substrate or equipment.
- Germination: With warmth and moisture, the spores start growing.
- Colonization: Mold spreads through the substrate, often faster than mushroom mycelium.
- Spore Production: Once mature, mold releases more spores, repeating the cycle.
Stopping this cycle at any point can prevent disaster.
Most Common Types Of Mold Contaminants
Not all molds look or behave the same. Some are easy to spot, while others hide until it’s too late. Here’s a closer look at the main types you might encounter:
1. Trichoderma (green Mold)
Trichoderma is perhaps the most notorious mold in mushroom cultivation. It starts as white mycelium but quickly turns bright green. It spreads rapidly, often destroying the mushroom mycelium and causing a foul smell. Trichoderma thrives in wet, poorly sterilized substrates.
2. Penicillium
Penicillium molds appear as blue or blue-green patches. They’re common in damp environments and can spread quickly from one substrate block to another. While not all Penicillium species are harmful, their presence signals poor hygiene or excess moisture.
3. Aspergillus
Aspergillus is a yellow, green, or black mold. Some species can produce dangerous toxins. In a mushroom grow, it often appears as dusty patches and can be harmful if inhaled, especially for people with allergies.
4. Cobweb Mold (dactylium)
Cobweb mold looks like thin, gray or white spiderwebs, often covering the surface of the substrate. It spreads extremely fast, sometimes engulfing an entire batch in a day or two. It thrives in still, humid air and poor air circulation.
5. Black Mold (stachybotrys)
Less common but very dangerous, black mold appears as dark, slimy patches. It can produce mycotoxins and should be handled with extreme caution.
6. Blue Mold
Similar to Penicillium but sometimes with a brighter blue color, blue mold often appears on older or damaged substrates. It indicates aging or poor substrate quality.
7. Lipstick Mold (gliocladium)
Lipstick mold forms pink or reddish colonies. It’s less common but can still destroy a grow if not caught early.
8. Bacterial Contamination
While not mold, bacterial contamination (often called wet spot) creates sour-smelling, slimy patches. These are usually yellowish or brown and thrive in overly wet substrate.
Recognizing these different molds is key to quick action. Many look similar at first, so it’s important to study photos and, when in doubt, remove any suspicious block to prevent spread.
Signs Of Contamination In Your Mushroom Grow
Catching contamination early is the best way to save your grow. Here’s what to look for:
- Unusual Colors: Green, blue, yellow, pink, or black spots are almost always a bad sign.
- Foul Odors: Healthy mycelium smells fresh and earthy. Sour, sweet, or rotten smells suggest contamination.
- Texture Changes: Slimy, fuzzy, or powdery patches on the substrate.
- Mycelium Behavior: Stunted, patchy, or dying mycelium. Sometimes the mycelium stops growing altogether.
- Rapid Spread: Molds, especially cobweb, can double in size overnight.
One practical tip: check your grow every day at the same time, as small changes are easier to spot when you have a routine. Keep a written or photo log for each batch—this helps you notice subtle differences.
Comparing Mold Vs. Healthy Mycelium
It’s not always easy to tell mold apart from healthy mushroom mycelium, especially for beginners. The table below highlights some of the key differences:
| Feature | Healthy Mycelium | Mold Contamination |
|---|---|---|
| Color | Bright white (sometimes slightly off-white) | Green, blue, pink, yellow, black, or gray |
| Texture | Cottony, ropey, or fluffy | Powdery, slimy, web-like, or crusty |
| Growth Speed | Gradual, steady expansion | Sudden, rapid spread (overnight in some cases) |
| Odor | Earthy, mushroom-like | Sweet, sour, rotten, or chemical |
| Effect on Substrate | Even colonization, healthy growth | Discoloration, rot, or mycelium death |
Two non-obvious tips: Healthy mycelium will often “recover” after a small disturbance (like a scratch or cut), but contaminated areas typically get worse. Also, healthy mycelium sometimes forms droplets (called “metabolites”), which are yellow-orange but usually harmless—don’t confuse these with mold.
Main Causes Of Mold Contamination
To prevent mold, you need to know how it gets in. The most common causes include:
1. Inadequate Sterilization Or Pasteurization
If your substrate isn’t properly sterilized (for grains) or pasteurized (for straw or compost), mold spores survive and multiply quickly. Even tiny lapses in temperature or timing can make a difference.
2. Poor Hygiene
Dirty hands, tools, or workspaces introduce mold spores. Even small particles of dust or hair can carry contamination.
3. Contaminated Spawn Or Substrate
If your mushroom spawn or substrate comes contaminated, mold can take over before you even notice.
4. High Humidity And Poor Airflow
Molds thrive in stagnant, humid conditions. Without fresh air, spores settle and grow faster.
5. Water Source Contamination
Using unfiltered or untreated water can introduce bacteria and mold spores.
6. Cross-contamination
Moving between contaminated and clean areas without changing gloves or clothes spreads spores.
Two insights beginners often miss: Even new bags or containers can carry invisible spores—wipe them down with alcohol before use. Also, using old or expired spores increases risk, as their natural defenses weaken over time.
Preventing Mold In Your Mushroom Grow
Prevention is always better than cure. Here’s how to keep your mushrooms mold-free:
1. Sterilize Substrate And Tools
- For grains: Pressure cook at 15 PSI for at least 90 minutes.
- For straw/compost: Pasteurize at 60-80°C (140-176°F) for 1-2 hours.
- Clean all tools with 70% isopropyl alcohol before each use.
2. Practice Good Hygiene
- Wash hands thoroughly and use gloves.
- Wear a mask and a hairnet to reduce spore spread.
- Work in a clean, dust-free environment. If possible, use a still air box or flow hood.
3. Source Quality Spawn And Substrate
- Buy from reputable suppliers.
- Inspect for off smells or discoloration before use.
- Store spawn in the fridge if not used immediately.
4. Control Humidity And Airflow
- Keep humidity at the recommended level for your mushroom species (often 80-95%).
- Use fans or air exchange systems to maintain fresh air.
- Avoid water pooling on the substrate surface.
5. Use Clean Water
- Filter or boil water before misting or soaking.
- Store water in clean, closed containers.
6. Monitor Regularly
- Check your grow daily for early signs of contamination.
- Remove any suspicious blocks or bags immediately.
7. Separate New And Old Batches
- Keep new grows away from older ones, as older batches may carry spores.
- Clean your grow area between cycles.
One advanced tip: UV sterilization wands can help disinfect surfaces and air in your grow area, but never use them directly on mushrooms or spawn.
How To Remove And Deal With Mold Contamination
Even with the best practices, contamination sometimes happens. React quickly to contain the problem:
- Isolate the Contaminated Batch: Move it away from healthy grows immediately.
- Seal and Dispose: Place contaminated substrate or blocks in sealed bags before disposal. Never compost indoors.
- Clean the Area: Wipe all surfaces with alcohol or a bleach solution.
- Check Adjacent Batches: Mold can spread by air—inspect everything nearby.
- Review Your Process: Identify where things went wrong (hygiene, sterilization, airflow).
Never try to “save” mushrooms from a heavily contaminated substrate. Some molds release invisible toxins, making even healthy-looking mushrooms unsafe.
Common Myths And Mistakes
There’s a lot of misinformation about mold and mushroom growing. Here are a few myths and the reality:
- Myth: “If it’s a small patch, just cut it out.”
- Reality: Mold often spreads below the surface. Removing visible mold rarely solves the problem.
- Myth: “All white growth is safe.”
- Reality: Some molds start white before turning color—always monitor changes.
- Myth: “Boiling is enough for all substrates.”
- Reality: Grains require pressure cooking to kill all spores. Boiling alone is not enough.
- Myth: “You can eat mushrooms from contaminated grows if you wash them.”
- Reality: Washing cannot remove all mycotoxins. When in doubt, throw it out.
Two more insights: Using too much water increases contamination risk by creating anaerobic (low-oxygen) pockets where bacteria and mold thrive. Also, over-crowding your grow area makes it easier for mold to spread from batch to batch.
Comparing Mold Contamination Rates By Substrate
Some substrates are more prone to contamination than others. Here’s how common options compare:
| Substrate Type | Contamination Risk (Low/Medium/High) | Notes |
|---|---|---|
| Brown Rice Flour (BRF) Cakes | Low-Medium | Easy to sterilize; low nutrients for mold |
| Grain (Rye, Millet, Corn) | High | Rich nutrients; must pressure cook |
| Straw | Medium | Requires pasteurization; risk if too wet |
| Sawdust/Pellets | Low | Low nutrients; easy to pasteurize |
| Compost/Manure | High | High microbial activity; difficult to sterilize fully |
The Role Of Genetics And Strain Selection
Not all mushroom strains are equally robust. Some strains are more resistant to molds, while others are highly sensitive. When possible, choose strains known for contamination resistance—especially if you’re growing in a less controlled environment.
A practical example: Oyster mushrooms are generally more resilient, while species like enoki or morels can be more sensitive. Ask your supplier about strain-specific risks.
Environmental Control: Temperature, Humidity, And Air Exchange
Mold thrives in warm, wet, and stagnant conditions. Here’s how to optimize your environment:
- Temperature: Most molds grow best between 20-30°C (68-86°F). Try to keep the grow area at the lower end for your mushroom species.
- Humidity: 80-95% is common for mushrooms, but avoid condensation and pooling.
- Air Exchange: Aim for 3-4 complete air changes per hour in your fruiting chamber. Use HEPA filters if possible.
A non-obvious insight: Using a timer for fans and humidifiers helps balance humidity and airflow, reducing the risk of both mold and mushroom drying.
Cleaning And Sanitizing Your Grow Area
Regular cleaning is critical. Here’s a sample routine:
- Daily: Wipe down surfaces with alcohol or a mild bleach solution. Check for new dust or debris.
- Weekly: Deep-clean all tools, shelves, and containers. Change any air filters.
- Between Grows: Completely empty and disinfect the entire grow area. Let it dry thoroughly before restarting.
Don’t forget to clean hard-to-reach corners and ceiling fans, as spores often hide there.

Credit: zombiemyco.com
How To Recover From A Contaminated Grow
If you lose a batch, don’t panic. Here’s how to bounce back stronger:
- Analyze the Failure: Write down everything about the contaminated batch—substrate, spawn, procedure, timing.
- Improve Your Process: Adjust sterilization times, clean more often, or invest in better airflow.
- Start Small: Test changes with a small batch before scaling up.
- Stay Positive: Even experienced growers lose batches sometimes. Each failure is a learning opportunity.
One tip: Some growers keep a “contamination diary” to spot patterns over time—this can reveal issues you’d otherwise miss.
When To Abandon A Grow
It’s hard to throw out weeks of work, but sometimes it’s the best choice. Abandon your grow if:
- More than 20% of substrate is contaminated.
- Mold has spread to multiple areas in the grow room.
- The batch smells strongly of chemicals, rot, or ammonia.
- You or others experience allergy symptoms near the grow.
Never risk your health or future grows for the sake of one batch.
Testing And Confirming Mold Types
If you’re unsure what kind of mold you’re dealing with, there are simple ways to confirm:
- Photograph the Contamination: Compare with online databases or forums.
- Use a Microscope: Even a basic one can reveal spore color and shape.
- Send Samples: Some labs offer mold identification for a fee. This is useful for commercial growers.
An advanced insight: UV light (blacklight) can sometimes reveal hidden mold patches, as certain molds fluoresce differently than mycelium.
Best Practices For Long-term Success
Consistency is your best defense. Here are the habits that separate successful growers from frustrated beginners:
- Plan Each Step: Know your sterilization, inoculation, and fruiting procedures in advance.
- Keep Records: Track every batch—substrate, strain, method, results.
- Stay Curious: Join forums, attend workshops, and read research on mushroom cultivation.
- Invest in Good Equipment: Pressure cookers, HEPA filters, and quality spawn pay for themselves in fewer losses.
For more advanced information, check out resources like Mushroom Cultivation on Wikipedia.

Credit: lykyn.com
Frequently Asked Questions
What Should I Do If I See Mold In My Mushroom Grow?
Immediately isolate and remove the contaminated batch. Clean the surrounding area with alcohol or bleach, and inspect all other batches for signs of contamination. Never try to salvage mushrooms from a moldy substrate.
Can You Eat Mushrooms From A Contaminated Substrate?
No. Even if the mushrooms look healthy, they may contain invisible toxins from the mold. Eating contaminated mushrooms can cause illness.
How Can I Tell The Difference Between Cobweb Mold And Mycelium?
Cobweb mold is gray, wispy, and grows much faster than mycelium. It often looks like a thin spiderweb and may cover the substrate overnight. Healthy mycelium is bright white and grows more slowly.
What’s The Best Way To Sterilize Substrate At Home?
For grains, use a pressure cooker at 15 PSI for at least 90 minutes. For straw or compost, pasteurize at 60-80°C (140-176°F) for 1-2 hours. Always clean tools and containers with alcohol before use.
Is Mold Contamination Inevitable In Mushroom Cultivation?
No, but it is common. With good hygiene, proper sterilization, and environmental control, you can minimize the risk. Most successful growers lose a batch occasionally but keep contamination rates low with consistent habits.
Growing mushrooms is a balance of science, routine, and careful observation. Mold contamination may seem intimidating, but with the right knowledge and habits, you can keep your grow healthy and productive. Every clean, successful batch is proof of your skill and attention—so keep learning, stay vigilant, and don’t let mold stand in your way.