
Starting a small mushroom farm is one of those rare ideas that blends curiosity, sustainability, and profit. Many people start with a simple kit on a kitchen shelf and soon find themselves harvesting more mushrooms than they can eat. Others dream of turning this hobby into a side hustle that brings in real income.
If you’re wondering how to make the jump from growing a few mushrooms for fun to running a small farm, this guide will walk you through every detail—step by step.
Mushrooms are unique. They don’t need sunlight, can be grown indoors, and offer high yields in small spaces. The demand for fresh mushrooms is rising worldwide, especially among people looking for healthy food and meat alternatives. But mushroom farming is not just about putting spores in a bag and waiting. It needs planning, learning, and a bit of patience.
Let’s explore how you can turn your interest in mushrooms into a rewarding and possibly profitable small business.
Understanding Mushroom Farming Basics
Before you start, it’s important to know what makes mushroom farming special. Mushrooms are fungi, not plants. They grow from spores, not seeds, and feed on organic material like straw, sawdust, or coffee grounds. Unlike regular crops, mushrooms don’t need sunlight, but they do need the right temperature, humidity, and cleanliness.
Mushroom farming can be done on a very small scale in your garage, basement, or even a closet. As you gain experience, you can expand into unused rooms or build a dedicated shed. The basics, however, remain the same—sterile conditions, good substrate, and the right type of mushroom.
The most popular types for beginners are oyster mushrooms and button mushrooms. They grow fast, are forgiving to mistakes, and have strong market demand.
Mushrooms also have a unique advantage: they can be grown year-round. Because you control the environment, you’re not limited by seasons as with many crops. This means you can keep producing and selling even when outdoor gardens are resting. Another important point is the short production cycle—oysters can go from spawn to harvest in just a few weeks, giving you fast feedback and a chance to improve with every batch.
However, not everything is simple. Mushrooms are sensitive to changes in their environment. Even small mistakes can lead to contamination, which ruins the entire batch. Beginners often overlook the need for cleanliness, thinking mushrooms are low-maintenance. In truth, success comes from careful attention to detail—something as simple as using dirty tools can bring in mold or bacteria that outcompete your mushrooms.
Choosing Your Mushroom Type
Your choice of mushroom will shape your whole project. Let’s look at the most common options and what makes each unique.
| Mushroom Type | Ease of Cultivation | Growth Time | Market Demand |
|---|---|---|---|
| Oyster | Very Easy | 2-3 weeks | High |
| Button (Agaricus bisporus) | Moderate | 4-6 weeks | Very High |
| Shiitake | Intermediate | 7-12 weeks | High |
| Lion’s Mane | Intermediate | 4-6 weeks | Growing |
- Oyster mushrooms: Quick to grow, tolerate a wide range of conditions, and produce high yields. Excellent for small spaces and beginners.
- Button mushrooms: These are the white or brown ones found in supermarkets. They need more precise control but have massive market demand.
- Shiitake mushrooms: Rich flavor, often grown on logs. More patience required, but they can command high prices.
- Lion’s Mane: Unique appearance and health benefits, gaining popularity in specialty markets.
For your first farm, oyster mushrooms are usually the safest bet. They are forgiving, fast, and you can experiment with different substrates.
It’s tempting to try growing several types at once, but starting with one variety lets you master the process and reduces confusion. Each mushroom has its own needs. For example, shiitake prefers wood-based substrates, while oysters are flexible and can even grow on recycled materials.
Lion’s Mane, known for its brain-like appearance and medicinal value, needs careful humidity control. By focusing on one type, you can fine-tune your space, timing, and techniques before moving on.
Also, consider local demand. Visit stores and restaurants in your area—see what’s available and what’s missing. Specialty mushrooms like Lion’s Mane or pink oysters can fetch higher prices if there’s little competition, but they may take extra marketing to educate buyers.
Button mushrooms, while popular, compete with large commercial farms, so your freshness and local story become your selling point.
Planning Your Mushroom Farm Setup
A successful mushroom farm starts with good planning. Here’s what you need to think about:
Space Requirements
You don’t need a huge space to start. A small room, garage corner, or even a large closet works. You need:
- Controlled temperature (15-25°C for most species)
- High humidity (80-95%)
- Fresh air exchange
- Low light (or indirect light for some species)
Many beginners use racks or shelves to stack bags or boxes. As you grow, you can expand your setup vertically.
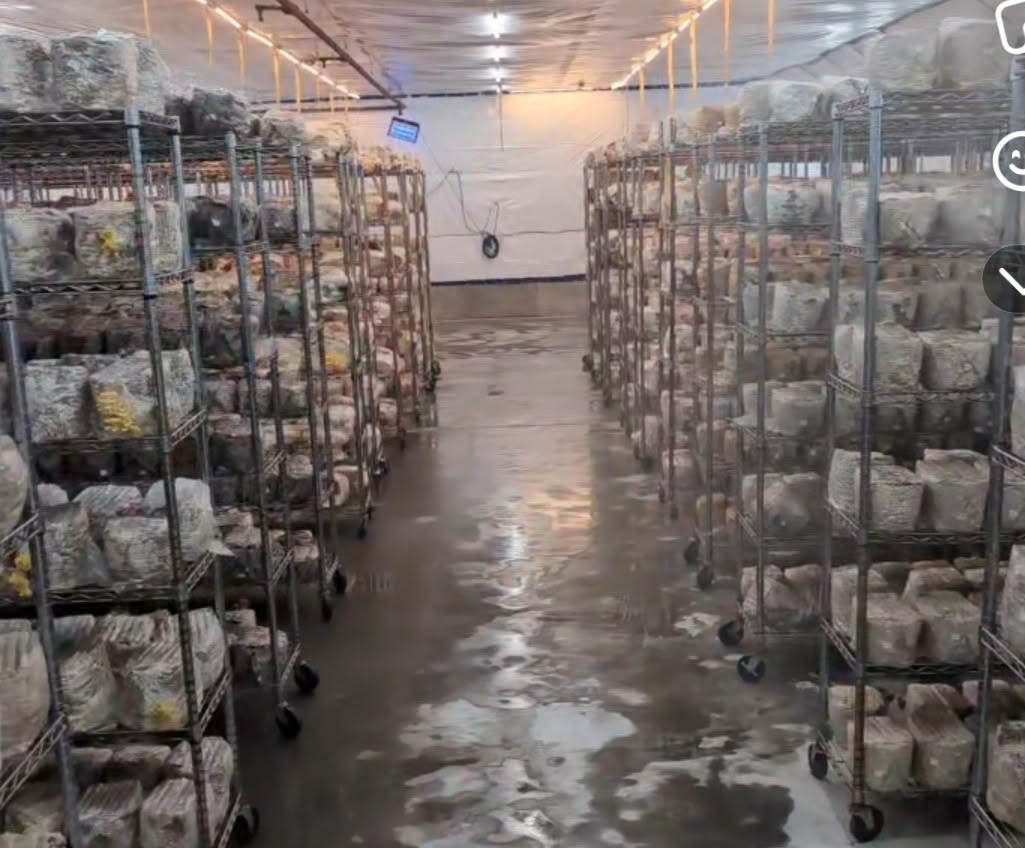
A key benefit of mushroom farming is how much you can produce in a small space. For example, a 2-square-meter area with three shelves can hold 40–60 grow bags at once, each producing up to 1 kg of mushrooms over a few weeks.
That’s a lot of food from a space no bigger than a closet!
Make sure your area is easy to clean. Bare floors, washable walls, and good drainage help you keep things sterile. Avoid carpet or wooden shelves that can hold onto moisture or harbor mold.
Equipment And Materials
At a minimum, you’ll need:
- Mushroom spawn (the equivalent of seeds)
- Substrate (straw, sawdust, coffee grounds, cardboard)
- Growing containers (plastic bags, buckets, trays)
- Spray bottle (for humidity)
- Thermometer and hygrometer (to monitor conditions)
- Gloves and masks (for cleanliness)
For a more advanced setup, consider a small humidifier, fans for air exchange, and plastic sheeting for lining walls.
Some growers use blackout curtains or tents to control light and create a clean zone. Others build simple “fruiting chambers” from plastic storage boxes or old refrigerators. The goal is to create an environment you can easily control and keep clean.
If you want to automate, basic timers and sensors can help manage humidity and air flow. But don’t feel pressured to buy everything at once—many successful farms start with simple, low-cost gear.
Budgeting And Startup Costs
Here’s a rough breakdown for a simple, small-scale farm (enough for learning and a small side hustle):
| Item | Cost (USD) |
|---|---|
| Mushroom spawn (1kg) | $15 |
| Substrate (straw, sawdust, etc.) | $10 |
| Plastic bags/containers | $10 |
| Humidity/temperature tools | $20 |
| Miscellaneous (gloves, cleaning supplies) | $10 |
| Total | $65 |
You can start small, test the process, then reinvest profits to scale up.
Keep in mind, your biggest ongoing costs will be spawn and substrate. Reusing tools and buying substrate in bulk can lower your per-batch cost. Many beginners overlook packaging and transport costs—factor these in if you plan to sell. As you grow, you might invest in better ventilation, shelving, or climate controls, but these are not needed at the very beginning.
Sourcing Materials And Spawn
The success of your mushroom farm depends heavily on the quality of your spawn and substrate.
Buying Or Making Spawn
Spawn is the material that holds the mushroom’s living tissue. Most beginners buy spawn from specialized suppliers. Make sure you buy from a reputable source—bad spawn means poor or zero harvests.
Some advanced growers make their own spawn using sterilized grains and a small lab setup, but for your first few cycles, buying is safest.
One thing most new growers don’t realize: even if spawn looks healthy, it can lose strength if stored too long. Always check the packaging date and use spawn as soon as possible. Old spawn can lead to weak growth and low yields, even if you do everything else right.
If you’re interested in long-term savings, research “grain spawn production” and consider setting up a small sterile area. But remember, this adds complexity and risk—contamination is more likely if you don’t have clean conditions.
Choosing A Substrate
The substrate is what mushrooms eat. Good options include:
- Straw: Cheap, easy to find, and works well for oysters.
- Sawdust: Best for shiitake and lion’s mane.
- Coffee grounds: Free and eco-friendly, but can attract mold if not handled carefully.
- Cardboard/newspaper: Great for experimenting.
Always pasteurize or sterilize your substrate to kill off unwanted fungi or bacteria. You can do this by soaking in hot water or steaming.
It’s tempting to use whatever is available, but not all substrates are equal. For example, straw from rice or wheat works better than straw from barley, which can be too tough. Sawdust should be from untreated wood—chemicals or paint can kill your mushrooms.
If you use coffee grounds, mix them with other materials to avoid “clumping,” which can trap water and breed mold.
One practical tip: when working with new substrates, start with small test batches. This lets you see how well the mushrooms grow and spot problems before scaling up.
Preparing The Growing Environment
Mushrooms are sensitive to their environment. A little effort here saves a lot of problems later.
Temperature And Humidity Control
Different mushrooms like different temperatures, but most thrive between 18-24°C (65-75°F). Use a small heater or air conditioner if needed.
Humidity should stay high (80-95%). A simple spray bottle works for very small setups. For larger farms, use a humidifier. Watch out for mold—too much water on surfaces can cause contamination.
It’s important to avoid sharp changes in temperature or humidity. Sudden drops can slow growth or stress the mushrooms, making them more likely to attract pests or disease. Use a thermometer and hygrometer you trust—cheap ones can be inaccurate and lead you to make the wrong adjustments.
Another overlooked factor is air quality. Mushrooms “breathe” by exchanging gases. If your growing area is too sealed, carbon dioxide can build up, causing long stems and small caps. Open windows, use small fans, or cut holes in bags to let in fresh air—but avoid strong drafts or direct wind, which can dry out your substrate.
Cleanliness And Contamination Prevention
The biggest challenge in mushroom farming is contamination by mold or bacteria. Always:
- Wash hands and wear gloves when handling spawn and substrate
- Clean all tools with alcohol or soap before use
- Keep pets and food away from your growing area
One non-obvious trick: do not overwater. Extra water creates the perfect environment for unwanted molds.
Another common mistake is to ignore small spots of contamination, hoping they’ll go away. In reality, mold spreads quickly. If you see green, black, or foul-smelling patches, remove the affected bag or tray immediately. Clean the area well and keep monitoring for new problems.
For the best results, create a routine. Clean your space before each batch, keep a separate pair of shoes for the growing room, and don’t allow outside soil or plants inside. Even tiny bits of dirt can bring in spores of competing fungi.
Step-by-step: Growing Oyster Mushrooms
Let’s walk through a typical cycle using oyster mushrooms. This method uses straw as the substrate and plastic bags as containers.
1. Prepare The Straw
- Chop straw into small pieces (2-5 cm)
- Soak in hot water (60-70°C) for 1 hour to pasteurize
- Drain and cool to room temperature
Chopping the straw helps the mycelium spread faster. Use garden shears, a lawn mower, or even scissors for small amounts. Make sure the straw is fully submerged during soaking—use a heavy object to keep it underwater. After pasteurizing, drain well; excess water can cause soggy bags and mold.
2. Mix With Spawn
- In a clean area, mix cooled straw with spawn (about 5-10% by weight)
- Fill plastic bags or buckets with the mixture
- Poke small holes for air
When mixing, aim for even distribution. If you add spawn in layers (“lasagna” style), you’ll get more even colonization. Don’t pack the bags too tightly—leave some air space. The holes allow for gas exchange and are where mushrooms will often emerge.
3. Incubation
- Place bags in a dark, warm place (20-24°C)
- Wait 10-14 days for the white mycelium to spread through the straw
Check bags every few days for contamination. The mycelium should cover the substrate with a white, fluffy layer. If you see green, black, or pink spots, remove those bags. Don’t open bags until the mycelium has fully colonized the straw.
4. Fruiting
- Move bags to an area with indirect light and fresh air
- Increase humidity by misting or using a humidifier
- Mushrooms begin to appear in 5-7 days
Cut small “X” shapes or holes in the bags to help mushrooms emerge. Maintain humidity by misting the air several times a day or running a humidifier. Light helps trigger fruiting, but avoid direct sunlight—it can dry out the substrate.
5. Harvest
- Harvest when the edges of the caps start to flatten
- Twist gently or cut with a sharp knife
Don’t wait too long to harvest—overripe mushrooms drop spores and become tough. After the first flush, keep misting and you’ll often get a second or third harvest from the same bag. Remove any old stems or leftover mushrooms to avoid contamination.
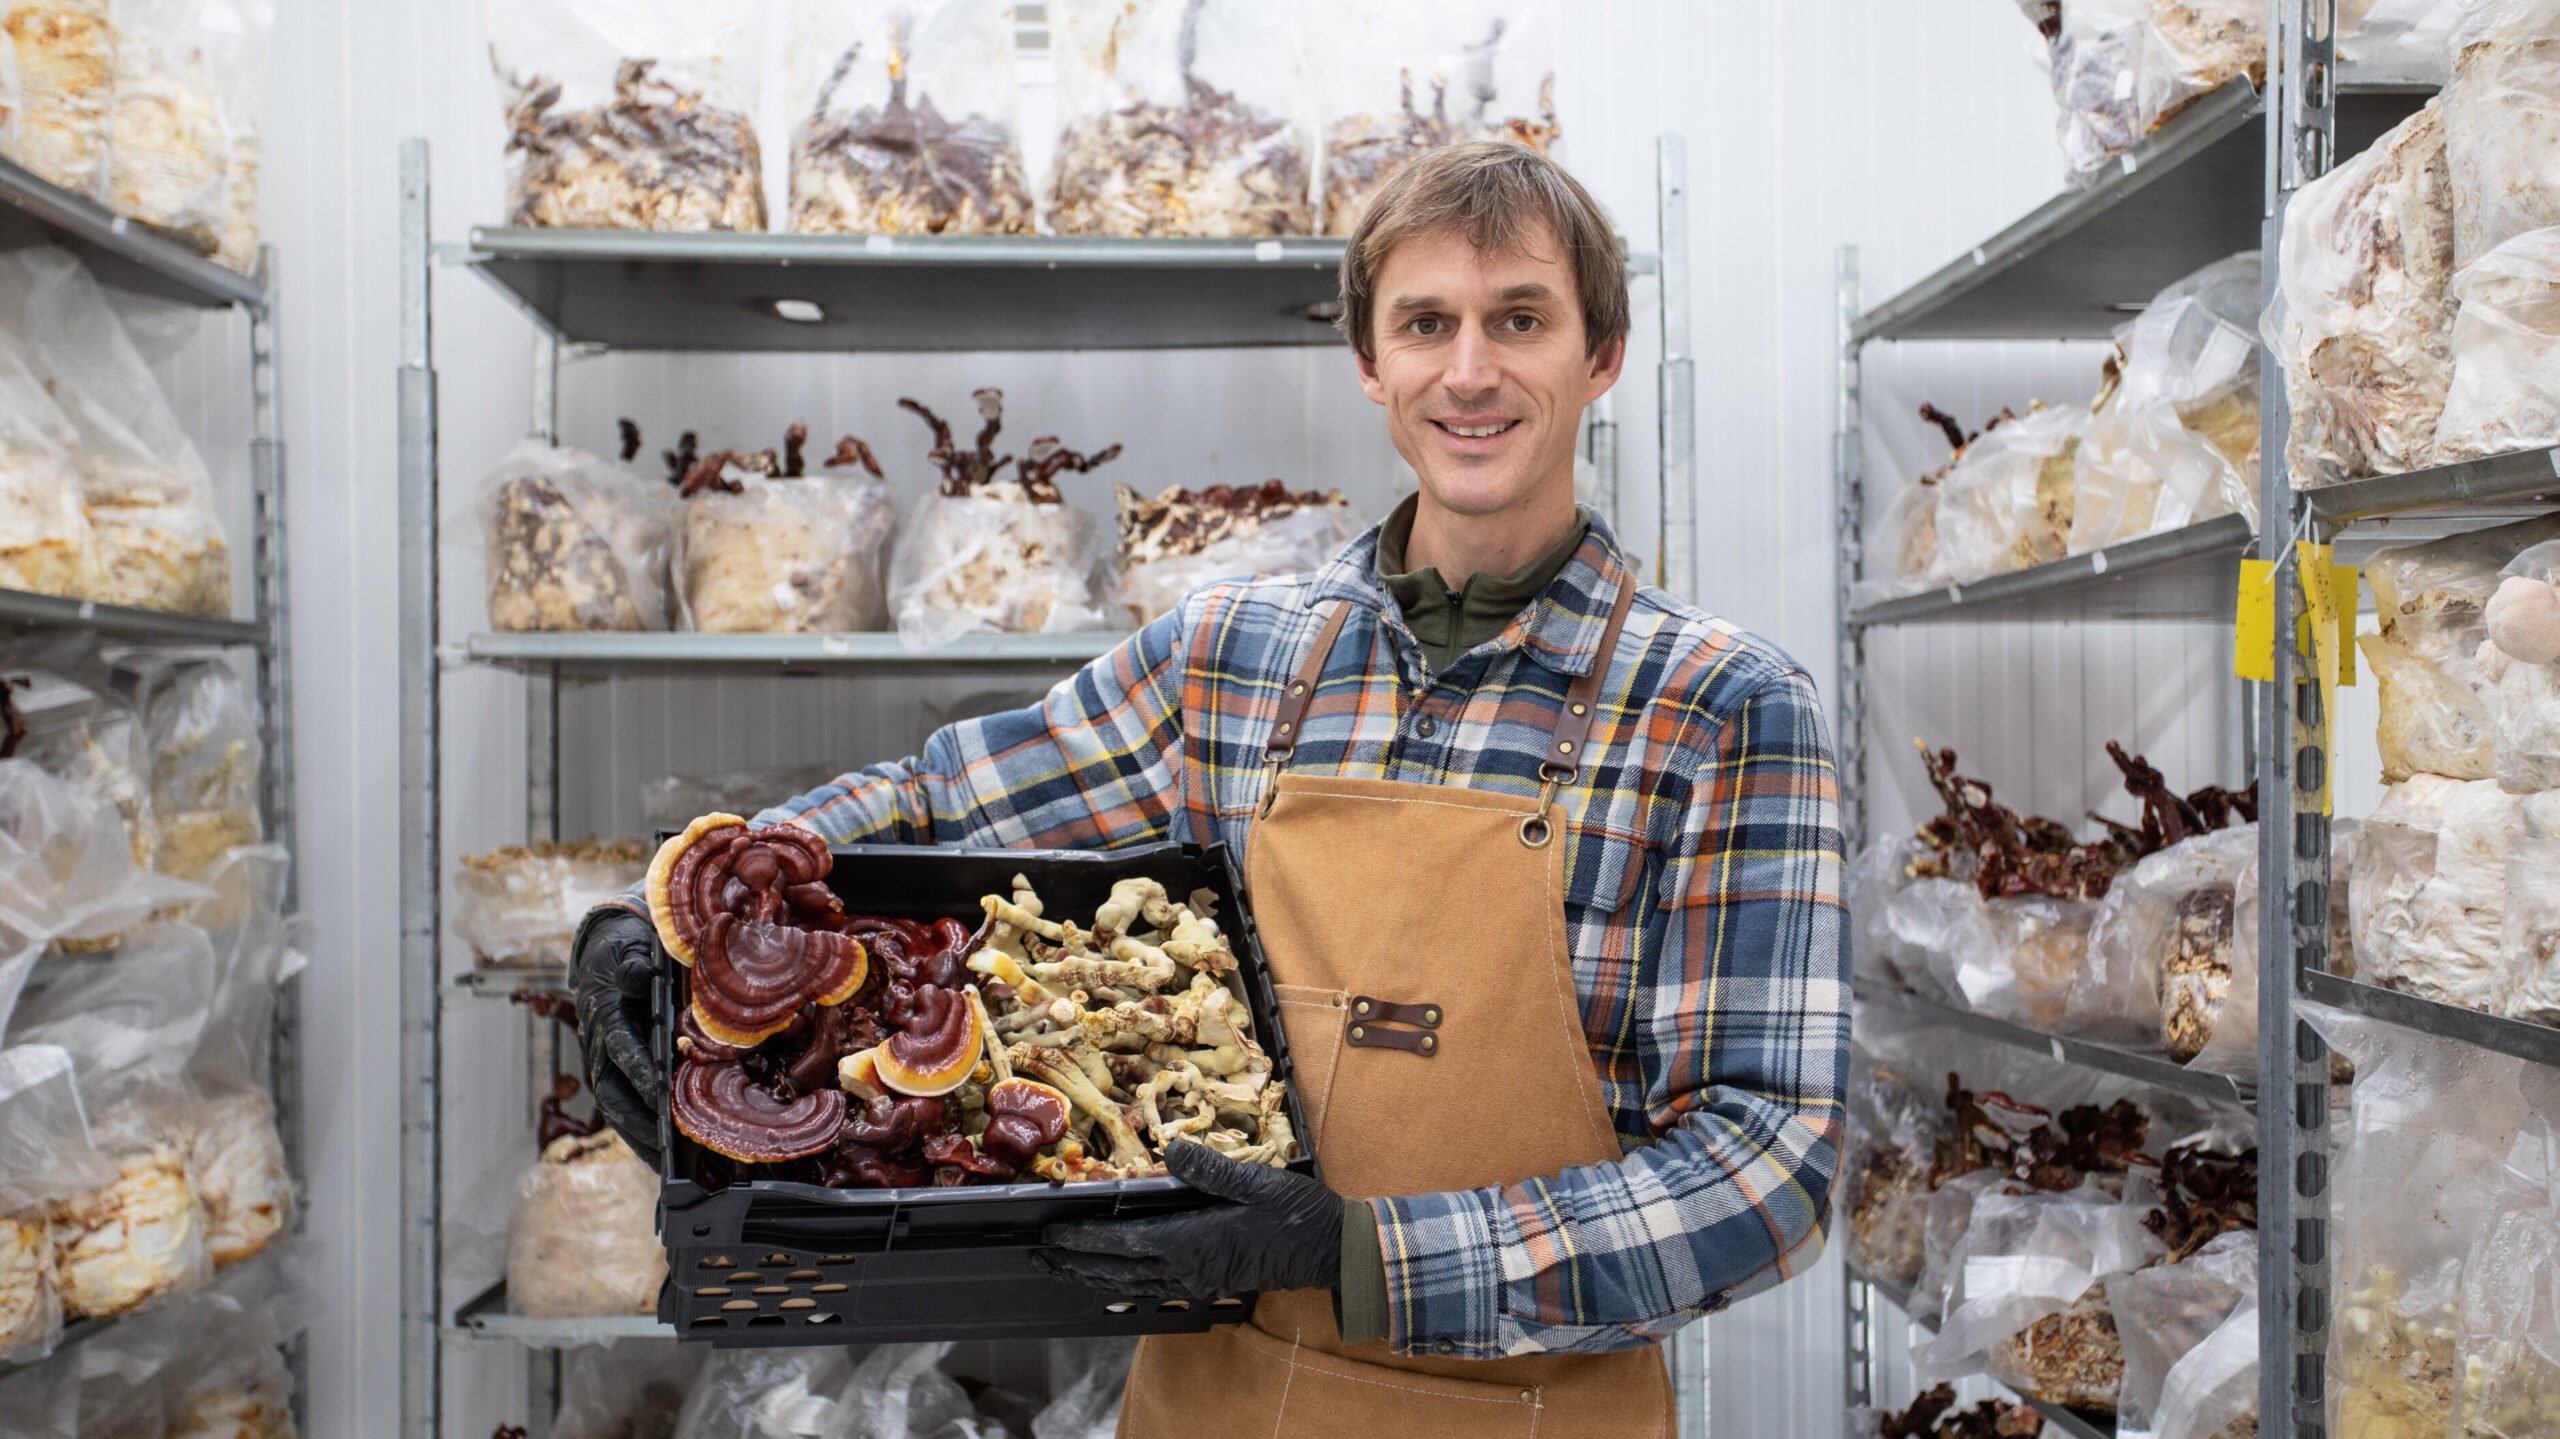
This cycle can repeat every 2-3 weeks. Each bag can produce multiple “flushes” (harvests).
A helpful tip: weigh each harvest and write it down. This lets you track which batches and methods give the best results.
Credit: grocycle.com
Scaling Up: Turning Hobby Into Side Hustle
Once you can grow mushrooms reliably, you can start thinking about selling. But before you jump in, consider these important steps.
Market Research
Study your local market:
- Are there farmers markets nearby?
- Do restaurants or grocery stores buy local mushrooms?
- What kinds of mushrooms are missing in your area?
Talk to chefs, visit markets, and check what’s selling. Even a small city can support several micro-farms if the mushrooms are fresh and unique.
When doing market research, don’t just look at prices—look at quality, freshness, and packaging. Some growers succeed by offering home delivery or specialty varieties that aren’t in stores. Others find a niche with organic certification or by supplying ethnic markets with mushrooms used in traditional dishes.
A smart move is to bring samples when you talk to potential buyers. Let them see and taste your product. Many chefs are open to trying new ingredients, especially if you can provide a reliable supply.
Legal Requirements
Laws vary by country and state. Common requirements include:
- Food safety certification
- Clean labeling and packaging
- Sometimes, health department inspections
It’s smart to check with your local agricultural extension office for advice.
Some areas require you to process and package mushrooms in a certified kitchen, especially if selling to shops or restaurants. Others allow direct sales from farm to customer with fewer rules. Keeping detailed records of your cleaning, growing, and packaging process can help if you ever need to show inspectors.
Don’t forget about taxes and business licenses. Even a small side hustle may need to register with local authorities, especially if you plan to grow your business over time.
Branding And Packaging
People buy with their eyes. Even if your mushrooms taste great, they must look fresh, clean, and well-packaged. Use:
- Paper bags or compostable containers
- Stickers with your farm name and harvest date
Some growers offer mushroom “grow kits” as a side product, which can command a good profit.
Attractive packaging not only protects your product but also tells your story. Consider including recipes or storage tips with each sale. A simple, memorable brand name and logo help people remember you and tell their friends.
Selling Your Mushrooms
Let’s look at where and how to sell your harvest.
1. Farmers Markets
Set up a stall and offer samples. Tell your story—people love to meet their grower. Bring a variety, and offer recipes or cooking tips.
Bring a cooler with ice packs to keep mushrooms fresh, and display them in baskets or on a clean tablecloth. Engage customers by explaining how you grow your mushrooms—many have never tasted truly fresh, local varieties. Offer bundle deals or discounts for repeat customers.
2. Restaurants And Cafés
Chefs love unique, fresh produce. Call local restaurants and offer free samples. Make sure to deliver early in the day and keep mushrooms chilled.
Follow up after your first delivery—chefs are busy and may forget to reorder. Consider offering seasonal specials or custom mixes. Build a relationship by learning what types or sizes they need. Some chefs may even let you put your farm’s name on their menu.
3. Grocery Stores
Some local stores support small producers. They may want regular supply and proper packaging. Be ready to provide invoices and keep records.
Be clear about your growing practices—organic, no chemicals, etc. If possible, include a short farm story or photo on your packaging. Ask if you can do in-store tastings or displays to attract customers.
4. Online And Home Delivery
Social media and local groups are great for building a customer base. Offer weekly mushroom boxes for pickup or delivery.
Platforms like Facebook Marketplace or Instagram help you reach new buyers. You can also join local food cooperatives or partner with community-supported agriculture (CSA) programs. Make sure you have a simple, clear ordering process and reliable delivery or pickup times.
Pricing Your Mushrooms
Oyster mushrooms often sell for $10–$15 per kg (sometimes more for specialty types). Calculate your costs, then set a fair price. Don’t underprice—fresh, local mushrooms are a premium product.
A useful approach is to offer small, medium, and large packs at different prices. This lets you serve both home cooks and chefs. If your mushrooms are organic or grown on recycled materials, highlight this in your marketing.
Credit: circularharvest.ca
Managing Risks And Common Mistakes
Even experienced growers run into problems. Here’s how to avoid the most common issues:
- Contamination: If you see green, black, or fuzzy patches, remove the infected bag right away. Use clean hands and tools at every step.
- Poor yields: Often caused by old spawn, poor substrate, or wrong temperature/humidity.
- Mushrooms not fruiting: Usually lack of fresh air or light. Open bags or increase ventilation.
- Overwatering: Too much water encourages mold. Mist the air, not the mushrooms directly.
- Neglecting records: Track your inputs, yields, and sales. This helps you spot problems and improve.
A non-obvious insight: Keep your first few cycles small. Trying to grow too much, too fast usually leads to mistakes and lost money.
Another hidden risk is “burnout. ” Mushroom farming can be intensive, especially during harvest weeks. Plan your schedule so you’re not overwhelmed—batch your work and take breaks between cycles. Don’t forget to celebrate your successes; even small harvests are a step forward.
Finally, don’t ignore feedback. If customers mention taste, texture, or shelf life, listen and adjust your process. Sometimes a simple change in harvest timing or packaging can make a big difference.
Tracking Costs, Yields, And Profit
The difference between a hobby and a side business is good record-keeping. Use a simple notebook or spreadsheet.
Track:
- Date of spawn and substrate preparation
- Harvest dates and amounts
- Sales (where, how much, price)
- Costs (spawn, substrate, packaging, market fees)
Here’s a sample monthly breakdown for a very small farm:
| Item | Quantity | Unit Cost | Total Cost |
|---|---|---|---|
| Spawn | 2 kg | $15 | $30 |
| Straw | 10 kg | $1 | $10 |
| Packaging | 50 bags | $0.20 | $10 |
| Market Fees | 4 days | $5 | $20 |
| Total | $70 |
If you sell 40 kg of mushrooms at $12/kg, that’s $480 in sales and over $400 in profit before labor. As you grow, you can increase batches and add more varieties.
A non-obvious point: tracking not just total yields, but yields per bag or per substrate batch, helps you spot which methods or spawn sources are most effective. This lets you invest in what works and fix what doesn’t.
Improving Your Farm: Advanced Techniques
Once you’re confident with basic cycles, you can increase efficiency and profit with these methods.
Using Monotubs Or Greenhouses
Larger containers called monotubs let you grow more mushrooms in less space. Some growers build small greenhouses or tents with shelves and automated humidity.
Monotubs are especially popular for indoor growers who want to scale up without building a full room. You can monitor and control each tub separately, reducing the risk of losing your whole crop to contamination. Greenhouses allow for larger scale production, but require careful control of temperature and humidity, especially in hot or cold climates.
Making Your Own Spawn
Advanced but cost-saving. You need a pressure cooker, sterilized jars, and a clean workspace. You can multiply purchased spawn many times over, but always watch for contamination.
A pressure cooker is key for sterilizing grains. Many growers use rye, millet, or wheat berries as the base. Working in a “still air box” or using a laminar flow hood reduces contamination risk. This step can seem intimidating, but it’s a major cost-saver once you have the basics down.
Adding New Varieties
Try shiitake, lion’s mane, or pink oysters. Each has different needs and markets. Start small, and ask local buyers what they want.
Shiitake often needs to grow on logs or supplemented sawdust blocks, which take more time but produce high-value mushrooms. Lion’s Mane needs steady humidity and good airflow. Pink oysters grow quickly but are more sensitive to temperature. Adding new types can attract repeat buyers and let you adjust to market trends.
Waste Recycling
Used substrate can be composted or used as animal feed. Some farmers use mushroom waste to grow worms for fishing bait or chicken feed—a smart way to add value.
Some advanced growers create a “closed loop” system: leftover substrate feeds worms, which in turn become feed for chickens or fish, and the compost returns nutrients to the garden. This kind of circular system appeals to eco-conscious customers and reduces disposal costs.
Marketing And Growing Your Brand
A strong brand helps you stand out from the competition.
Telling Your Story
People love buying from real people. Share photos of your farm, growing tips, and recipes on social media. Host “open days” or workshops for the community.
If you’re comfortable, make short videos explaining your process or sharing a harvest. Answer questions online or at markets—being approachable builds customer loyalty. Your story (why you started, what you believe in) is often as important as your product.
Building Partnerships
Work with local chefs, food bloggers, or health stores. Offer to give talks or demonstrations. These partnerships can open new sales channels and make your brand more trusted.
Look for community events, school programs, or food festivals where you can showcase your mushrooms. Team up with other local farmers to offer mixed produce boxes. Cross-promotion helps everyone grow.
Exploring New Products
Besides fresh mushrooms, consider:
- Dried mushrooms (long shelf life, high value)
- Mushroom powders (for cooking or supplements)
- Grow kits (for schools and home gardeners)
Dried mushrooms can be made with a simple food dehydrator and sold in small packs. Powders are popular with health-conscious customers or those who want to add nutrition to smoothies and soups. Grow kits are a great way to reach new audiences—many people are curious but not ready to start a full farm.
Keep innovating, but don’t lose focus on quality and freshness.
Sustainability And Eco-friendly Practices
Mushroom farming is inherently sustainable. Mushrooms turn waste like straw and sawdust into food. To go further:
- Use local, recycled materials for substrate
- Compost spent substrate
- Use minimal plastic, or switch to biodegradable packaging
Sustainable practices are not just good for the earth—they’re a selling point for eco-conscious customers.
You can also reduce your environmental impact by using rainwater for misting, or installing solar panels for climate control. Some growers partner with local coffee shops to collect used coffee grounds for substrate, reducing landfill waste. Sharing your eco-practices in your marketing helps build trust and loyalty.
Learning From Mistakes And Successes
Every mushroom grower has stories of bags that turned green or harvests that went wrong. The key is to learn and improve each time.
One insight: keep detailed notes about each batch. Over time, you’ll see patterns—what worked, what failed, what sold best. This is how small farms become great businesses.
Also, don’t be afraid to ask for help. There are active online communities and local growers who love sharing advice.
If something goes wrong, don’t give up. Most successful farmers have faced failures—sometimes whole crops are lost to mold or equipment breaks down. Treat these as learning opportunities. Over time, your skills and confidence will grow, and your process will become more consistent and reliable.
For more background and in-depth guides, the Wikipedia: Mushroom Cultivation page is a trusted resource.
Credit: farmboxfoods.com
Frequently Asked Questions
How Much Space Do I Need To Start A Mushroom Farm?
You can start with as little as 1–2 square meters (10–20 square feet). A small shelf or closet is enough for a hobby farm. For a side hustle, look for a spare room, garage corner, or small shed—enough to hold several shelves or racks.
If you want to scale up, think about workflow—leave enough room to move, clean, and harvest. Don’t crowd your bags too closely, or you’ll risk humidity problems and slow growth.
How Long Does It Take To Harvest Mushrooms?
Oyster mushrooms are ready to harvest in 2–4 weeks after setting up the bags. Button and shiitake mushrooms may take 4–12 weeks, depending on the method and variety.
Harvest times can vary with temperature and spawn quality. Warmer rooms speed up growth, but too much heat can stress the mushrooms. Keep records to see what works best in your setup.
What Are The Most Common Mistakes For Beginners?
The biggest problems are contamination (mold), using old or poor-quality spawn, and not keeping the right temperature or humidity. Start small, keep everything clean, and don’t rush the process.
Another mistake is ignoring feedback from buyers. If your mushrooms wilt too fast or have a strong smell, ask for honest input and adjust your process.
Is Mushroom Farming Profitable As A Side Hustle?
Yes, if you control costs and find steady buyers. Many small growers earn $200–$1,000 a month with a part-time setup. Profit depends on your market, quality, and how well you manage risks.
Tracking all expenses—including your own time—helps you see real profit. Diversifying with new products or markets increases your income and stability.
Do I Need Special Licenses To Sell Mushrooms?
It depends on your location. Some areas require food safety permits or inspections, especially for selling to stores and restaurants. Always check with your local health or agricultural office before selling to the public.
Keeping good records and following basic food safety keeps you ready for any inspection. As you grow, consider joining local farm groups or cooperatives for support.
Starting a small mushroom farm is a journey—a mix of science, patience, and creativity. With careful planning, a bit of hustle, and a passion for quality, your hobby can become a rewarding side business. Whether you grow for your own kitchen or for your community, mushrooms have a way of turning small spaces into something magical.