Building a clean, safe space for mushroom work is a game-changer for anyone growing fungi at home. Many beginners learn about a still air box (SAB) when they first try to move spores or cultures without contamination. If you’ve lost jars to mold or bacteria, you know how important cleanliness is for success. But you don’t need expensive laboratory equipment to get clean transfers. A homemade SAB is affordable, effective, and within reach for almost anyone.
In this guide, you’ll learn exactly how to build a mushroom still air box, why it works, and how to use it for reliable results. You’ll get tips and insights from real experience—things most guides leave out, but matter in practice.
By the end, you’ll know how to make your own SAB, avoid common mistakes, and get the most out of your mushroom projects.
Why You Need A Still Air Box For Mushroom Cultivation
Mushroom growing starts with sterile technique. Even a few dust particles or sneezes can bring in contaminants. In open air, bacteria and mold spores float everywhere. These invisible threats can ruin cultures, jars, or even full batches of substrate.
A still air box creates a mini-environment where the air is not moving. This means floating spores settle down and don’t land on your tools, plates, or grain. You get a basic, portable “clean space” without the cost of a laminar flow hood.
Comparing Common Clean Environments
To see why a SAB is the go-to choice for home growers, compare it to other options:
| Method | Cost | Effectiveness | Skill Needed |
|---|---|---|---|
| Still Air Box | Low ($30-60) | High (when used correctly) | Beginner |
| Laminar Flow Hood | Very High ($400+) | Very High | Intermediate/Advanced |
| Open Air | None | Very Low | Beginner |
The SAB wins for most hobbyists because it’s simple, effective, and doesn’t require special skills or expensive gear.
When A Sab Is Essential
- Transferring agar cultures
- Making grain-to-grain transfers
- Inoculating jars with spores or liquid culture
- Cloning wild mushrooms
Whenever you need to open a sterile container, a SAB keeps contamination away. Without it, success rates drop fast, even if you’re careful.
How A Still Air Box Works
The core idea is simple: block moving air. Most contamination in mushroom work happens when drafts or hand movements stir up dust and spores. A SAB is just a clear box with arm holes, trapping the air inside so it stays still. This gives you a bubble of clean, calm air to work in.
Why Not Just Use A Flow Hood?
A laminar flow hood pushes filtered air across your work area. This is better, but also expensive and hard to build. For most home growers, a SAB does the job for 90% of tasks at a fraction of the cost.
The Science Behind Still Air
Studies show that even minimal air movement can lift thousands of spores into the air. Once inside a SAB, gravity pulls these particles down and they settle on the bottom. If you wait a few minutes before starting work, almost all floating particles are gone. This is why patience and stillness matter as much as the box itself.
Key Features Of An Effective Sab
- Clear sides for visibility
- Tight, smooth arm holes for comfort and sealing
- Spacious interior for jars, plates, and tools
- No extra holes or gaps where drafts can enter
- Easy to clean with alcohol or disinfectant
Materials And Tools Needed
You don’t need many tools or expensive parts to build a great SAB. Most items are found at hardware stores or online. Here’s a full list with tips for choosing the best options.
Main Materials
- Large clear plastic storage tote (60-100 liters / 15-25 gallons)
- Choose one with flat, clear sides for visibility.
- The bigger, the better—room to move is key.
- Hole saw or sharp utility knife
- For cutting smooth arm holes.
- A 5-6 inch (12-15 cm) hole saw works best.
- Sandpaper (medium and fine grit)
- To smooth arm holes and prevent scratches.
- Alcohol wipes or spray
- For cleaning the box after construction.
- Permanent marker
- To mark hole placement.
- Measuring tape or ruler
- For accurate, symmetrical holes.
- Optional: Rubber gaskets or foam insulation
- For sealing arm holes if you want a tighter fit.
Picking The Right Box
Not all totes are equal. Pay attention to:
- Plastic clarity: Avoid colored or frosted bins; these reduce visibility.
- Lid strength: Some lids are too flimsy—test before buying.
- Side smoothness: Avoid heavy texture; smooth is easier to clean.
- Size: At least 24 inches (60 cm) wide for comfortable movement.
Real-world Tip
Some beginners use small boxes to save money. But cramped SABs make it hard to work without bumping tools or touching walls—leading to more contamination. Go big if you can.
Step-by-step: Building Your Mushroom Still Air Box
Making your SAB takes about 30–60 minutes. Follow these steps for a clean, safe box that will last years.
1. Planning The Arm Holes
Arm holes are the main part of a SAB. Here’s how to get them right:
- Measure and mark two circles on the front side of your tote, about 8–10 inches (20–25 cm) apart.
- Holes should be 5–6 inches (12–15 cm) in diameter—big enough for your arms with gloves.
- The bottom of the holes should be 6–8 inches (15–20 cm) above the base of the box. This gives room for jars and plates.
2. Cutting The Holes
- Place the tote on a stable surface.
- Use a hole saw if you have one—it makes smooth, perfect circles.
- If using a utility knife, go slow and cut several passes instead of forcing through at once.
- Watch your hands; thick plastic can slip.
3. Smoothing The Edges
- Sand the inside and outside of each hole until smooth.
- Test with your bare arm—no sharp edges should remain.
- If desired, add rubber gasket or foam for comfort, but this is optional.
4. Cleaning The Sab
- Wipe the entire box, inside and out, with alcohol or disinfectant.
- Pay special attention to the arm holes and lid.
- Let it dry fully before use.
5. Final Assembly
- Place the lid tightly on the box.
- Your SAB is now ready for use.
- Store in a clean, dust-free place when not in use.
Example: Dimensions For A Popular Sab
| Feature | Suggested Size | Why Important? |
|---|---|---|
| Box volume | 75 liters (20 gallons) | Room for jars, plates, and tools |
| Arm holes | 6 inches diameter, 10 inches apart | Fits most adult arms comfortably |
| Height from base | 8 inches | Space for working with tall jars |

Credit: www.youtube.com
Preparing Your Sab For Use
A SAB only works well if you keep it clean and use it correctly. Here are the steps to prepare before every transfer.
1. Choose A Clean Room
- Select a room with minimal airflow.
- Close windows and doors.
- Turn off fans, heaters, or air conditioning.
- Avoid rooms with carpets or pets.
2. Clean The Work Area
- Wipe down the table or surface where the SAB will sit.
- Use alcohol or a bleach solution.
- Let the area dry before setting up your SAB.
3. Clean The Sab Inside And Out
- Wipe the SAB with alcohol-soaked paper towels or wipes.
- Focus on the bottom and sides, as these collect the most dust.
- Let the SAB sit with the lid on for at least 5–10 minutes. This lets dust and spores settle.
4. Prepare Tools And Materials
- Lay out everything you need: Plates, jars, inoculation loop, scalpel, alcohol, lighter, etc.
- Wipe tools and jars with alcohol before placing inside.
- Place all items inside the SAB before you start—opening the lid mid-procedure increases contamination risk.
5. Personal Cleanliness
- Wash hands and forearms thoroughly.
- Wear clean clothes, and tie back long hair.
- Many growers wear a face mask to avoid breathing inside the SAB.
Hidden Insight
Many guides tell you to spray alcohol inside the SAB. In truth, this is risky—alcohol vapors are flammable and can be dangerous when used with open flames. Instead, use alcohol to wipe down surfaces and let the fumes clear before starting work.
How To Use A Still Air Box For Clean Transfers
With your SAB ready, you’re set to make clean transfers. The right technique is as important as the box itself. Here’s a step-by-step guide for using your SAB for agar, grain, or spore transfers.
1. Move Slowly And Deliberately
- Insert your arms through the holes.
- Wait a few seconds to let any stirred-up air settle.
- Make all movements slowly. Fast motions create air currents, lifting up dust and spores.
2. Flame Sterilize Tools Outside The Sab
- Light your scalpel or inoculation loop outside the SAB, not inside.
- Alcohol vapors can catch fire—never use an open flame inside a SAB.
- Let tools cool for a few seconds before bringing them inside.
3. Perform Transfers With Care
- Open jars, plates, or containers only when ready.
- Hold lids above the opening to block falling dust.
- Make transfers quickly but gently—minimize time open to air.
4. Close Everything Before Removing
- Seal jars, plates, or bags tightly before moving them out.
- Double-check that nothing is left unsealed.
- Remove your arms, then take out finished items.
5. Clean Up After Each Session
- Wipe down the inside of the SAB after use.
- Let it air dry with the lid off before storing.
Example: Agar To Agar Transfer Steps
- Place new agar plate and donor plate inside SAB.
- Flame sterilize scalpel outside box.
- Insert arms, open donor plate, and cut a small wedge.
- Open new plate, transfer wedge, and close both plates quickly.
- Seal plates and remove them from SAB.
Advanced Tips For Better Results
Even a basic SAB can produce near-sterile results, but these extra tips can help you get even better success rates.
1. Minimize Openings
Only open the SAB lid when absolutely necessary. Add all tools and plates before starting. If you forget something, finish your current transfer and then open the lid—never while a plate or jar is open.
2. Use A Damp Cloth Inside
A slightly damp paper towel placed inside the SAB can help trap dust and spores. This is a trick used by professionals—just don’t let it touch your work.
3. Practice Hand Movements
Before starting, practice moving your hands inside the SAB. Try to avoid bumping the sides or lid, which can shake loose dust.
4. Label Everything
Sterility means nothing if you mix up your plates or jars. Label everything before placing it inside the SAB. Once inside, writing on tape is difficult.
5. Upgrade Over Time
As you gain experience, you may want to improve your SAB. Some growers add arm sleeves or gaskets for a tighter seal, or use double boxes for extra protection. Always balance upgrades with ease of use—too many modifications can make the box awkward.
Less-known Insight
Many guides ignore humidity. Dry rooms with static electricity can cause dust to stick to plastic and tools. Before working, consider running a humidifier in the room for 10–20 minutes. This reduces static and improves cleanliness.
Common Problems And How To Fix Them
No project goes perfectly on the first try. Here’s how to avoid or fix typical SAB issues.
Problem: Foggy Or Scratched Plastic
- Solution: Use a plastic polish or car headlight restorer to clear up foggy sides. Avoid abrasive cleaners.
Problem: Arm Holes Too Small Or Sharp
- Solution: Widen holes with a larger hole saw or file. Add rubber gasket or sand more thoroughly.
Problem: Not Enough Space Inside
- Solution: Upgrade to a larger tote. Use a folding table to support a bigger box.
Problem: Contamination Continues
- Solution: Check your technique. Move slower, clean more thoroughly, and avoid opening the SAB during transfers.
Problem: Lid Doesn’t Fit Tight
- Solution: Add weather stripping or foam tape around the lid edge. Replace with a better-fitting lid if needed.
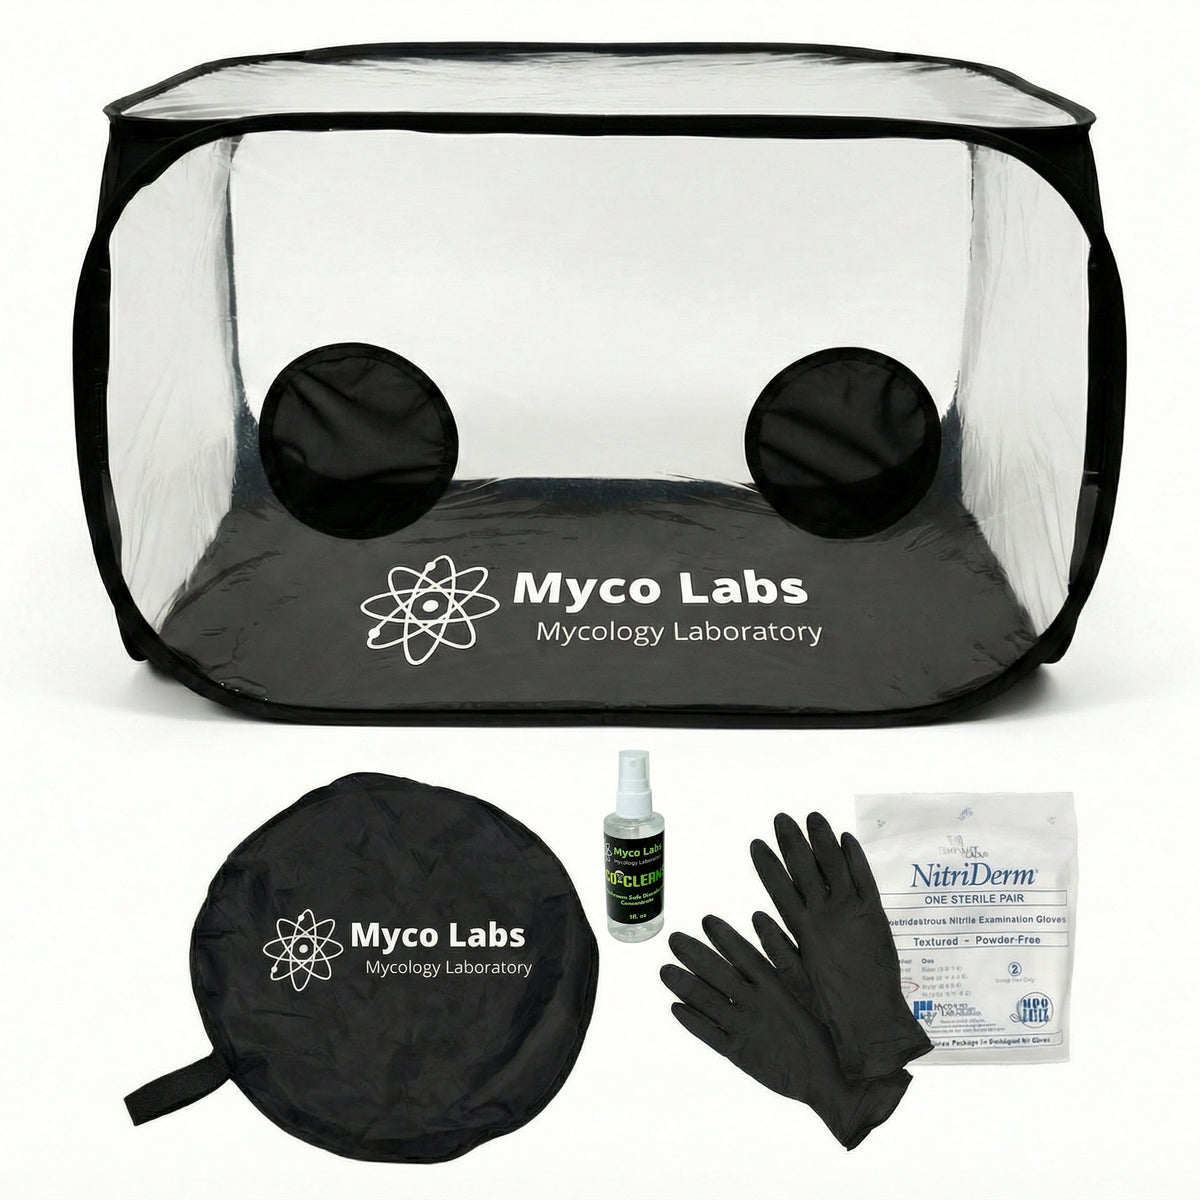
Credit: www.midwestgrowkits.com
Comparing Sab With Other Home Lab Options
Some growers wonder if a SAB is enough, or if they should upgrade. Here’s a comparison of the most common home lab setups:
| Setup Type | Cost | Best For | Drawbacks |
|---|---|---|---|
| Still Air Box | $30–60 | Beginners, small batches | Can be awkward for big projects |
| Flow Hood | $400+ | Large-scale or advanced work | Expensive, heavy, takes space |
| Glove Box | $60–120 | When higher sterility is needed | Less comfortable, limited access |
For most hobbyists, a well-built SAB balances cleanliness and cost better than any other method.
Cleaning And Maintenance For Long-term Use
A SAB lasts for years with basic care. Here’s how to keep it working like new.
1. Regular Cleaning
- After each use, wipe down all surfaces with alcohol or disinfectant.
- Let dry fully before storing with the lid on.
2. Deep Cleaning
- Every few months, wash the SAB with mild soap and warm water.
- Rinse well to remove any residue.
- Dry with a lint-free towel.
3. Inspect For Damage
- Check for cracks, scratches, or loose arm holes.
- Repair or replace if needed. Even small cracks can let in dust.
4. Store Properly
- Keep the SAB in a dry, dust-free area.
- Don’t store heavy items on top—it can warp the lid.
Pro Tip
If your SAB starts to smell musty, wipe it with diluted vinegar, rinse, and air out for a day.
The Role Of Still Air Boxes In Mushroom Success
A SAB is not a magic bullet, but it’s the single best upgrade for most home growers. With good technique and regular cleaning, most users see contamination rates drop by 80–90% compared to open-air work.
Many experienced mycologists started with a SAB and used it for years before moving to a flow hood. Even professionals use SABs for certain tasks. Learning to use one well is a core skill for anyone serious about mushroom cultivation.
Extra Insights: What Most Guides Miss
- Lighting matters. Position your SAB near a bright window or under strong lights. Working in shadows increases mistakes and accidents.
- Arm fatigue is real. Plan your work in short sessions. If you feel tired, rest—shaky hands are a bigger risk than dust.
- Disposables add safety. Use pre-sterilized gloves, alcohol wipes, and single-use scalpels when possible. This lowers contamination even more.
- Practice makes perfect. Build your SAB, then practice “dry runs” with empty plates and jars. This builds muscle memory and confidence.
- Document your process. Take notes or photos of your SAB and setup. This helps you troubleshoot problems and improve over time.

Credit: www.youtube.com
Frequently Asked Questions
What Is The Main Difference Between A Still Air Box And A Glove Box?
A still air box is a clear plastic tote with open arm holes, designed to block drafts and keep air inside still. A glove box has sealed arm holes with gloves attached, giving a more closed environment. SABs are easier to build and use, while glove boxes offer higher sterility but can be more awkward and less comfortable.
Can I Use A Cardboard Box Or Aquarium Instead Of A Plastic Tote?
While some growers have used cardboard boxes, these are not ideal. Cardboard absorbs moisture and can harbor mold. Glass aquariums are heavy and hard to cut. A clear plastic tote is the best option: lightweight, durable, and easy to clean.
How Often Should I Clean My Still Air Box?
Clean your SAB with alcohol or disinfectant before and after every use. Deep clean with soap and water every few months, or if it gets visibly dirty. Regular cleaning prevents buildup of dust and contaminants.
Is It Safe To Use A Lighter Or Flame Inside The Sab?
No. Never use an open flame inside a SAB. Alcohol fumes are flammable and can cause dangerous fires. Always flame sterilize your tools outside the box, let them cool, then bring them inside to work.
Where Can I Learn More About Sterile Technique For Mushroom Growing?
There are many great resources online. One reliable starting point is the Wikipedia page on sterile technique. You can also find detailed guides on mushroom forums and YouTube.
Final Thoughts
A homemade still air box is one of the most important tools for clean, successful mushroom cultivation. With just a bit of effort and basic supplies, you can build a SAB that rivals professional setups for most home projects. By following the steps and tips above, you’ll minimize contamination, save time and money, and enjoy healthier, more reliable mushroom harvests.
Remember, patience and careful technique are as important as the box itself. Practice, improve, and soon you’ll get clean transfers every time. Happy growing!