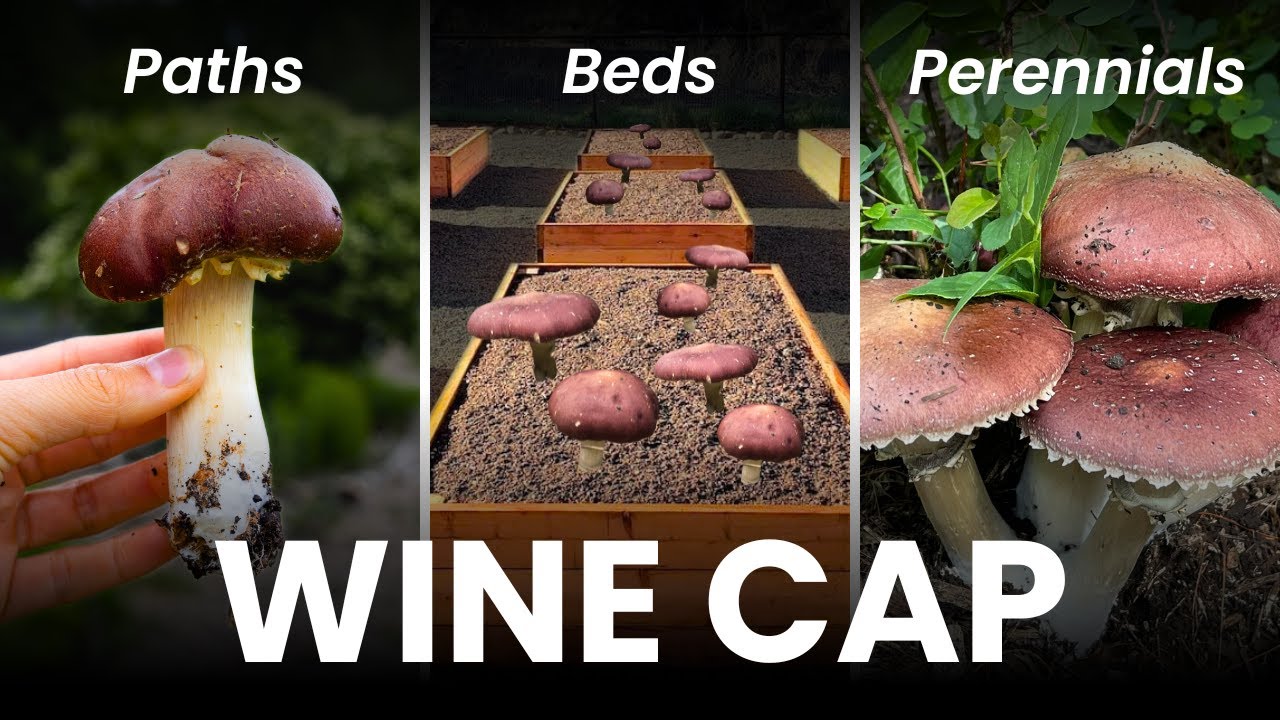
Growing your own wine cap mushrooms in garden beds is an adventure that adds both flavor and richness to your outdoor space. These mushrooms, also known as Stropharia rugosoannulata or “garden giants,” are famous for their robust size, rapid growth, and earthy taste. Wine cap mushrooms are not just a delicacy—they’re also a fantastic way to improve your garden’s soil and recycle organic material. Many gardeners overlook this simple crop, but with just a little know-how, you can produce baskets of delicious mushrooms right alongside your vegetables.
Home cultivation can seem complex, but wine caps are among the easiest mushrooms for beginners. They thrive outdoors and need minimal care once started. Many people are surprised by how forgiving and productive these mushrooms are, especially compared to other gourmet fungi.
This guide will walk you through everything—choosing the right bed, sourcing spawn, preparation, planting, maintaining, harvesting, and solving common challenges. You’ll learn practical tips, see real-world examples, and avoid mistakes that often set beginners back. Soon, you’ll be enjoying fresh, homegrown wine caps from your own garden.
Why Grow Wine Cap Mushrooms?
Wine cap mushrooms offer several unique benefits that make them ideal for home gardeners:
- Low maintenance: Once established, wine caps need little attention. They can thrive in a range of conditions that many other mushrooms cannot tolerate.
- Soil improvement: These mushrooms break down wood chips and organic matter, enriching your garden beds. Their activity helps build healthy soil structure and supports beneficial microbes.
- Dual cropping: You can grow wine caps right alongside vegetables. They don’t compete for nutrients and often improve the growth of nearby plants.
- High yield: With the right conditions, a single garden bed can produce several kilograms of mushrooms in one season.
- Pest resistance: Wine caps are less prone to pest and disease issues compared to many other mushrooms.
Many gardeners are surprised to discover that wine cap mushrooms can act as a living mulch, suppressing weeds and holding moisture in the soil. Their mycelium—the thread-like body of the fungus—forms a network that helps the garden ecosystem thrive.
Understanding Wine Cap Mushrooms
Before you start, it helps to know what makes wine cap mushrooms unique.
- Appearance: Wine caps get their name from the reddish-burgundy caps they develop. Young mushrooms are deep purple-brown and mature to a lighter, tan color. The gills are white at first, turning gray and then black as they age.
- Taste: Many describe the flavor as earthy, nutty, and reminiscent of potatoes or artichokes when cooked.
- Growth speed: Wine caps are fast growers. Fruiting bodies can appear just 10–16 days after the right conditions are set up.
- Mycelium network: The underground part of the mushroom—the mycelium—is what you actually “plant.” This network can spread over several square meters if given enough food.
Unlike many mushrooms that need sterile conditions, wine caps are robust and can handle the open-air, microbe-rich garden environment.
Planning Your Wine Cap Bed
Proper planning makes all the difference in your first harvest. Here are the key points to consider:
Choosing The Right Location
Wine caps prefer part-shade but will also fruit in full sun if the substrate stays moist. Look for areas under shrubs, beside raised beds, or along garden paths. Avoid spots that dry out quickly or are heavily compacted.
- Partial sunlight: 4–6 hours daily is ideal.
- Moisture: Beds should drain well but not dry out completely.
- Space: Plan for at least 1–2 square meters for your first patch.
When To Start
Wine cap mushrooms grow best when daytime temperatures are between 10°C and 25°C (50°F to 77°F). This means most gardeners start their beds in spring or early fall. Mycelium will colonize the bed over several weeks before fruiting begins.
What You’ll Need
Before you get started, gather these essentials:
- Wine cap spawn: Usually sold as colonized grain or sawdust. Buy from a reputable supplier.
- Wood chips or straw: The main food for your mushrooms. Hardwood chips (oak, maple, beech) are best. Pine and cedar are less suitable.
- Fresh water: For soaking and keeping the bed moist.
- Shovel or rake: For spreading substrate materials.
- Cardboard or newspaper: Optional, to create a weed barrier.
How Much Spawn To Use
A general rule: For every 1 square meter of bed, you’ll need about 2–3 kg (4–7 lbs) of wine cap spawn. Using more spawn speeds colonization and reduces the risk of contamination by wild fungi.
Step-by-step: Building Your Wine Cap Bed
Now let’s get practical. Here’s the process from start to finish.
1. Prepare The Site
Clear the area of weeds and grass. If you’re building over lawn, mow it short. Lay down a thick layer of cardboard or several sheets of newspaper—this helps stop weeds from growing up through your bed and keeps moisture in place.
2. Lay The Substrate
Wine caps love fresh hardwood chips or straw. Here’s how to layer your bed:
- Add 10–15 cm (4–6 inches) of wood chips or straw on top of the cardboard.
- Wet this layer thoroughly. The material should be damp but not soggy.
3. Add The Spawn
Break up your wine cap spawn into small chunks. Sprinkle it evenly across the bed, pressing it lightly into the wet chips or straw. Try to distribute spawn every 15–20 cm (6–8 inches).
4. Build Up Layers
For best results, alternate layers:
- Chips/straw (4–6 cm)
- Spawn
- Chips/straw
Repeat this until the bed is 20–25 cm (8–10 inches) deep. The top layer should always be wood chips or straw, not spawn.
5. Water The Bed
After layering, water the entire bed well. Consistent moisture is key during the first few weeks. The bed should feel like a wrung-out sponge—moist but not flooded.
6. Mulch And Mark
To keep things tidy and prevent drying, top with a thin layer of straw or leaves. Mark the bed with a sign or stake so you remember where your mushrooms are growing.
7. Maintenance In The First Weeks
- Water regularly, especially if it’s hot or dry.
- Avoid overwatering; standing water will harm the mycelium.
- If the bed dries out, soak it deeply with a hose.
What Substrate Is Best? A Comparison
Different materials can be used for wine cap beds, but some perform better than others. Here’s a quick look at the most common options:
| Substrate | Yield Potential | Speed of Colonization | Ease of Use | Notes |
|---|---|---|---|---|
| Hardwood Chips | High | Moderate | Easy | Best for long-term production |
| Straw | Medium | Fast | Very Easy | Quickest but breaks down fast |
| Softwood Chips | Low | Slow | Moderate | Avoid pine or cedar |
| Compost | Medium | Moderate | Easy | Can mix with wood chips |
Non-obvious tip: Mixing straw and hardwood chips gives you both fast first flushes (from the straw) and longer, steady yields (from the chips).
Sourcing And Storing Wine Cap Spawn
Your results depend heavily on the quality of your wine cap spawn. Here’s what to know:
- Buy fresh: Spawn loses vigor if stored too long. Order close to planting time.
- Storage: If you must store spawn, refrigerate it in a sealed bag for up to 1–2 weeks.
- Type: Sawdust spawn tends to spread fastest, but grain spawn is easier to break up and distribute.
A common mistake is using spawn that’s too old or dried out—it may not colonize well or at all.
Non-obvious tip: If you want to expand your patch later, you can use chunks of colonized wood chips from your first bed as new “spawn” for another area.
Wine Cap Mushrooms And Companion Planting
One of the biggest advantages of wine caps is their ability to grow with vegetables, fruits, and even some flowers. Here’s how to use them in companion planting:
- With tomatoes and peppers: Wine caps help retain soil moisture and suppress weeds.
- With corn or sunflowers: The mushrooms use the shade and help recycle fallen stalks.
- With berry bushes: Mycelium can protect roots and improve nutrient cycling.
- With perennial herbs: Mushrooms thrive under sage, chives, or comfrey.
Just avoid planting them with highly competitive or allelopathic (toxin-releasing) plants like black walnut.
Watering And Ongoing Care
Wine cap beds need different care as the season progresses.
First 4–6 Weeks
- Water 2–3 times a week if there’s no rain.
- Don’t let the bed dry out completely.
- Check under the mulch to ensure moisture is consistent.
After Colonization
You’ll notice white, thread-like mycelium spreading through the chips or straw. This means the wine caps are ready to fruit. At this stage:
- Reduce watering; let the bed almost dry on the surface between rains.
- Heavy rain can trigger fruiting.
Signs Of Problems
- Dry, cracked bed: Increase watering.
- Sour smell: Too wet—improve drainage.
- Green or black mold: Usually not a problem for wine caps, but reduce watering and remove contaminated material.
How Long Until Harvest?
Wine cap mushrooms can fruit as soon as 2–3 months after planting in warm weather. In cooler climates, the first harvest may not come until the following spring. Once established, beds can produce for 2–3 years if topped up with fresh wood chips each fall.
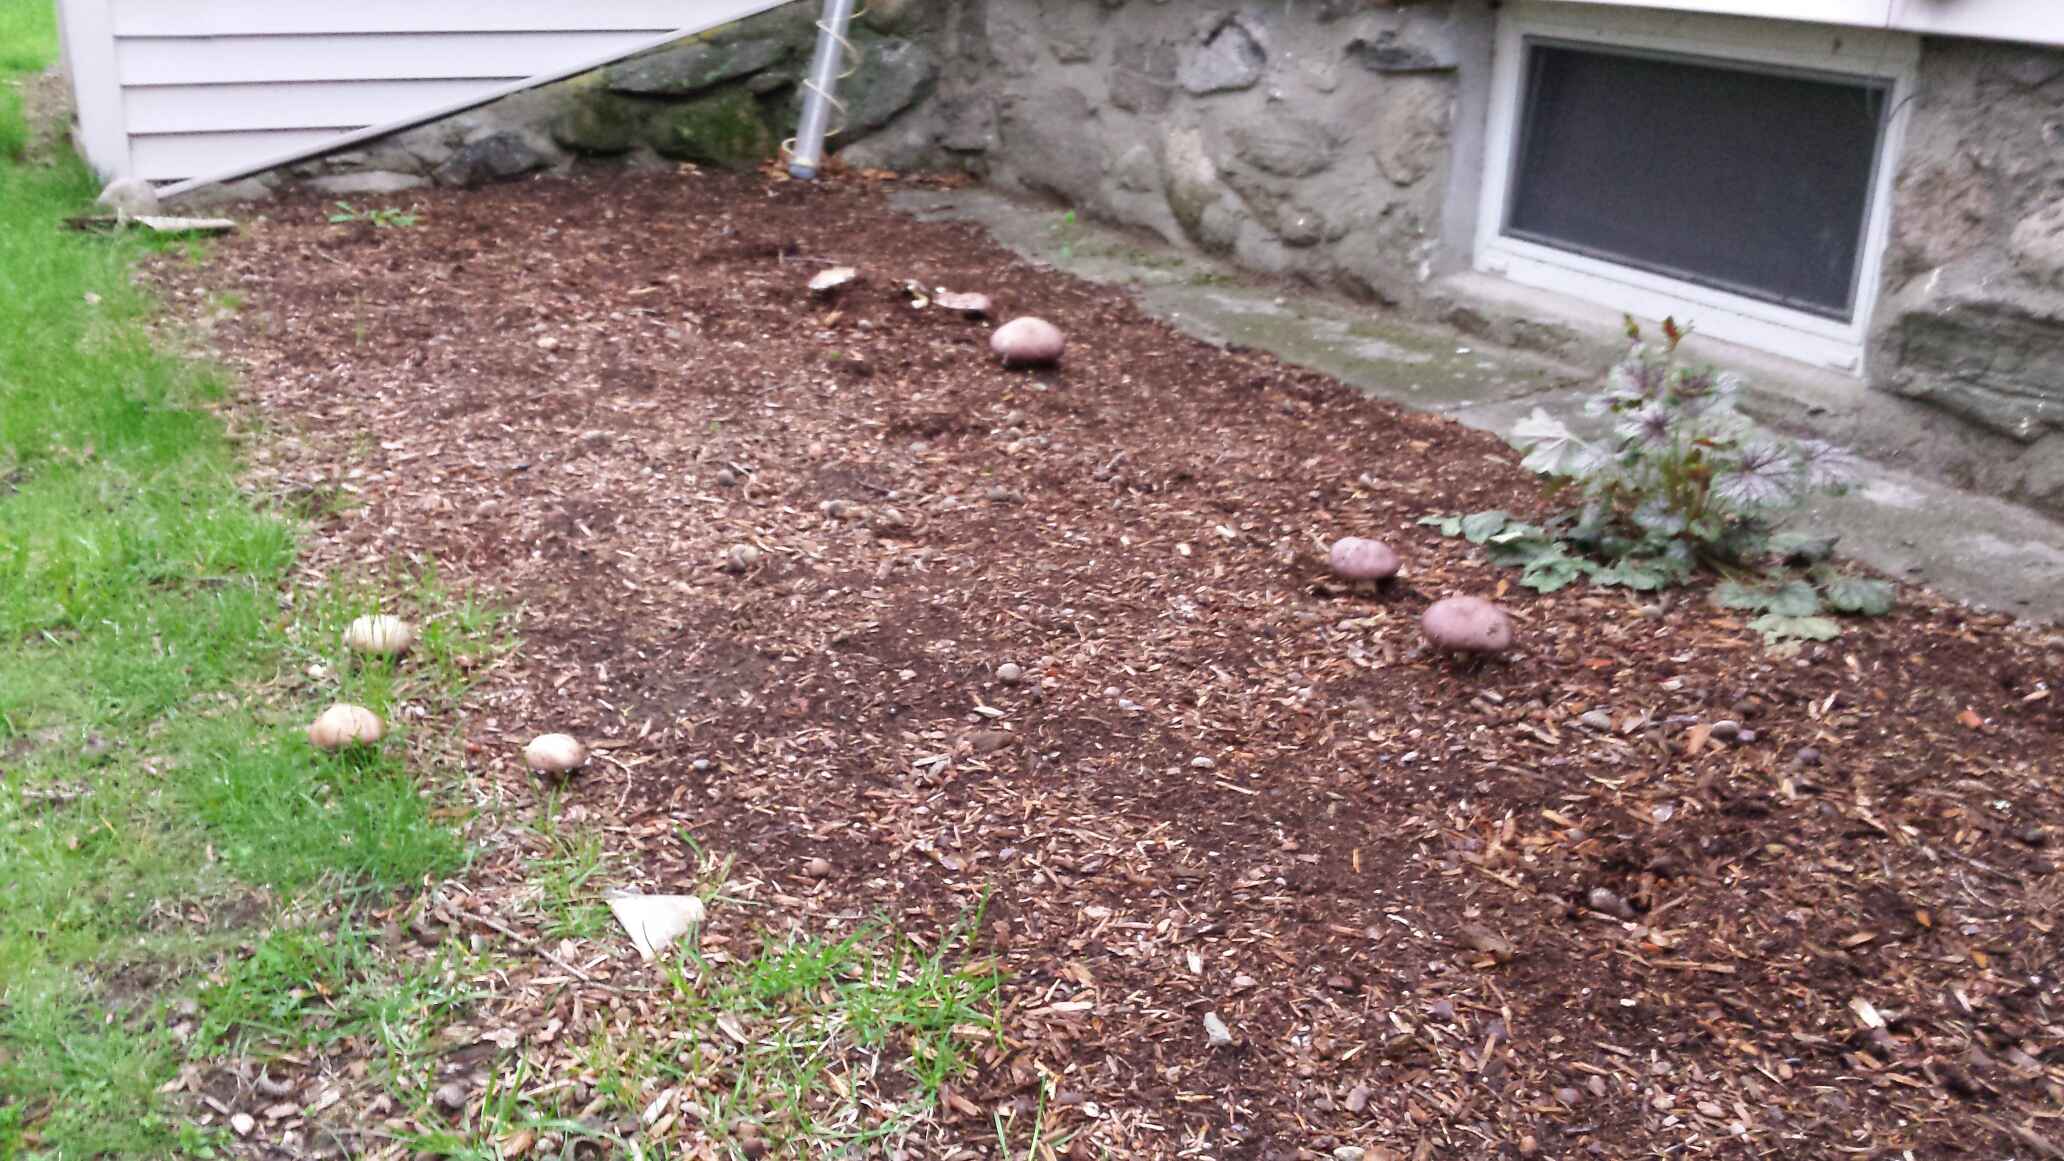
Harvesting Wine Cap Mushrooms
The best time to pick wine caps is when the cap edges are still curled under and the gills are white or pale gray. Here’s how to harvest for quality and sustainability:
- Gently twist or cut the mushroom at the base.
- Avoid pulling, which can disturb the mycelium.
- Small mushrooms are tender, but larger ones are still good for grilling or soups.
Harvest every 1–2 days during flushes, as wine caps grow quickly and can double in size overnight.
Non-obvious tip: If you leave a few mature mushrooms to drop spores, the patch may expand naturally each year.
Storing And Using Your Harvest
Wine caps are best eaten fresh, but you can store them for a few days in the fridge. Place in a paper bag (not plastic) to prevent moisture buildup. For longer storage:
- Slice and sauté, then freeze in small portions.
- Dry in a food dehydrator for soups or risottos.
- Pickle in vinegar and herbs for a tangy snack.
Wine cap mushrooms are delicious in stir-fries, omelets, or grilled with a touch of olive oil.
Troubleshooting: Common Problems And Solutions
Even the easiest mushrooms can have issues. Here are the most common problems and how to fix them.
My Mushrooms Won’t Fruit
- Bed too dry: Increase watering.
- Too much sun: Add more mulch or shade.
- Competing fungi: Use more spawn next time to “outcompete” wild molds.
- It’s the wrong season: Wait for cooler, wetter weather.
Mold Or Off Odors
- Sour or rotten smell: Bed is waterlogged. Stop watering and let it dry out.
- Green mold: Usually harmless, but remove if it’s thick.
Pests
- Slugs and snails: Pick by hand or use barriers.
- Rodents: Cover the bed with mesh if animals are a problem.
Very Small Mushrooms
- Poor substrate: Use higher-quality wood chips.
- Not enough spawn: Increase amount next time.
Extending Your Wine Cap Patch
After your first season, you can expand your patch easily:
- Remove a spadeful of colonized chips from your established bed.
- Use them as “spawn” for a new bed elsewhere.
- Repeat the layering process with fresh wood chips.
Wine caps are vigorous and will often spread beyond their original patch if conditions are right. Some gardeners end up with mushrooms popping up in unexpected places—this is a sign of healthy mycelium!
Comparing Wine Cap Mushrooms To Other Garden Mushrooms
How do wine caps stack up against other common garden mushrooms? Here’s a quick comparison:
| Mushroom Type | Ease of Growing | Yield | Preferred Substrate | Flavor Profile |
|---|---|---|---|---|
| Wine Cap | Very Easy | High | Wood Chips, Straw | Earthy, Nutty |
| Oyster | Moderate | Medium | Straw, Coffee Grounds | Mild, Sweet |
| Shiitake | Challenging | High | Hardwood Logs | Rich, Savory |
| Button | Easy | Medium | Compost | Classic Mushroom |
Wine caps stand out for their combination of yield, speed, and soil improvement—making them a top choice for edible landscaping.
Credit: northspore.com
Advanced Tips For Bigger, Better Harvests
Once you’ve mastered the basics, these tricks can help you get even more from your wine cap bed:
- Mix substrate types: Alternate layers of straw and wood chips for both fast and long-term production.
- Add compost tea: Watering with diluted compost tea can boost mycelium growth.
- Edge your bed: Use logs or stones to hold in moisture and define the patch.
- Apply fresh wood chips each year: This feeds the mycelium and keeps production high.
- Let a few mushrooms mature: Dropping spores encourages future generations.
Non-obvious tip: In very hot climates, add extra shade (such as a temporary cloth cover) to keep your bed from drying out during heat waves.
Safety And Identification
Wine cap mushrooms are easy to identify, but it’s essential to be cautious. They have:
- A reddish, wine-colored cap (when young)
- White to gray gills
- A thick, white stem with a ring
If you’re ever unsure, consult a local expert or use a guidebook. Never eat wild mushrooms unless you are certain of their identity.
For more on safe identification, see the Wikipedia page on Stropharia rugosoannulata.
How Wine Caps Improve Your Garden
Beyond food, wine caps benefit your garden in ways most people never consider:
- Break down mulch: Wine cap mycelium decomposes wood chips and straw, turning them into rich, dark soil.
- Boost beneficial microbes: Their presence supports healthy bacterial and fungal communities in the soil.
- Reduce disease: Some studies suggest that wine cap mycelium can suppress harmful soil pathogens.
- Help retain moisture: Beds stay damp longer, reducing watering needs for nearby plants.
- Support pollinators: The decomposed mulch creates habitat for beetles and other beneficial insects.
Non-obvious tip: After a few years, old wine cap beds can be dug into the garden to provide a rich source of organic matter and nutrients for new crops.
Mistakes Beginners Often Make
Even with their forgiving nature, wine cap mushrooms can challenge first-timers. Here are the pitfalls to avoid:
- Using old, dry spawn: Always start with fresh, vigorous spawn for best results.
- Not enough substrate: Thin beds dry out fast and produce poorly.
- Planting in deep shade: Full darkness slows growth—some dappled sun is helpful.
- Neglecting watering: Mycelium needs consistent moisture, especially in the early weeks.
- Expecting instant results: Mycelium takes time to colonize—be patient.
Credit: www.youtube.com
Real-world Example: A Small Urban Garden
Linda, a gardener in Toronto, turned a single 2×2 meter garden bed into a mushroom patch using wine cap spawn and local maple chips. She layered cardboard, then added chips and spawn in spring. By summer, she was picking her first flush of mushrooms—over 5 kg in total that season.
The following year, she noticed her tomatoes growing more vigorously in the same bed, and the soil was darker and easier to work.
Sustainability And Wine Cap Mushrooms
Growing wine caps fits well into a sustainable garden system:
- They recycle wood chips, straw, and yard waste into food.
- Mycelium helps sequester carbon in the soil.
- No synthetic fertilizers or pesticides are needed.
- Mushrooms support biodiversity, attracting earthworms and insects.
If you want to reduce waste and increase your garden’s productivity, wine caps are a great step toward a closed-loop system.
Credit: www.fungially.com
Harvesting And Yield Data
How much can you expect from a typical garden bed? It depends on your substrate, spawn amount, and weather, but here’s a general guideline:
| Bed Size | Spawn Used | Estimated Annual Yield | Productive Years |
|---|---|---|---|
| 1 m² | 2 kg | 5–8 kg | 2–3 |
| 2 m² | 4 kg | 10–16 kg | 2–3 |
| 5 m² | 10 kg | 25–40 kg | 2–3 |
These numbers can vary with local climate, but wine caps are among the most productive mushrooms you can grow outdoors.
Frequently Asked Questions
How Do I Know When My Wine Cap Mushrooms Are Ready To Harvest?
Pick wine caps when the caps are still rounded and the gills are white to light gray. If the cap flattens and the gills turn black, the mushroom is past its prime but still edible. Daily checks during flushes are best, as mushrooms grow quickly.
Can I Use Wood Chips From My Own Yard?
Yes, as long as the chips are from hardwood trees like oak, maple, or beech. Avoid wood with paint, chemicals, or from toxic species like black walnut, cedar, or pine. Fresh chips are ideal; aged chips still work but may have more competing fungi.
Will Wine Cap Mushrooms Spread Outside The Bed?
If conditions are right, wine cap mycelium can spread into nearby mulch or compost. This is usually a good thing, as it improves soil health. However, keep in mind that mushrooms may pop up in unexpected places, especially after rain.
Are Wine Cap Mushrooms Safe To Eat?
Wine cap mushrooms are considered safe and are widely cultivated. Still, always be certain about identification before eating any wild or homegrown mushroom. If unsure, consult a local expert or guidebook.
Do Wine Cap Mushrooms Need Shade?
Partial shade is ideal, but wine caps tolerate more sun than many mushrooms if the bed stays moist. In hot, dry weather, extra mulch or temporary shade can prevent the bed from drying out.
Growing wine cap mushrooms in your garden beds is a rewarding experience that combines food production, soil improvement, and sustainable gardening. With the right preparation and care, you’ll enjoy abundant, delicious harvests and a healthier garden ecosystem year after year.