
Building a laminar flow hood for sterile mushroom work is an exciting project for anyone passionate about mycology. If you want to grow mushrooms successfully at home or in a small lab, you need a clean environment. Contaminants like mold or bacteria can ruin your mushroom cultures quickly. A laminar flow hood creates a safe, sterile workspace by blowing clean air across your tools and media. While buying a commercial flow hood is expensive, building your own is possible with the right knowledge and materials. This guide will walk you through every step, from understanding how laminar flow works to building, testing, and using your own hood safely. Whether you’re a hobbyist or a small-scale grower, you’ll learn how to create professional results at a fraction of the cost.
Understanding Laminar Flow Hoods
A laminar flow hood is a box or cabinet that pushes filtered air in a single direction. The air passes through a HEPA filter (High Efficiency Particulate Air) that removes almost all dust, spores, and microbes. When you work in front of the hood, clean air flows past your tools and work area, blowing contaminants away and preventing them from landing on your mushroom cultures.
There are two main types:
- Horizontal laminar flow hoods: Air flows from the back of the hood towards you.
- Vertical laminar flow hoods: Air flows from the top down towards the work surface.
For mushroom growing, the horizontal type is preferred because it’s easier to build, and the airflow is less likely to blow contaminants from your hands or arms onto your cultures. Most home builders choose a horizontal laminar flow hood.
Why Is Sterility So Important?
Mushrooms grow from spores and mycelium, which are very sensitive to contamination. Common contaminants include:
- Mold spores (like Trichoderma)
- Bacteria
- Yeasts
Any of these can outcompete your mushroom culture, ruin your work, or even create health risks. Working in front of a flow hood reduces contamination rates from over 50% down to less than 1% when used correctly. This is essential for:
- Making agar plates
- Transferring mycelium
- Inoculating grain jars or bags
A flow hood is a big step up from a still air box, which only blocks drafts but does not actively clean the air.
Planning Your Build
Before you start, planning is key. Here are the main things to consider:
Size Of The Hood
The size you need depends on how much space you want to work with. The most common size is 24 inches wide x 18 inches high of HEPA filter area. This gives enough room for your hands, tools, and several plates or jars. If you build it too small, it feels cramped; too big, and the cost goes up.
- Minimum for one person: 24” x 18”
- For two people or large projects: 36” x 24” or bigger
Budget
Building a flow hood yourself will cost between $300 and $700 for a standard size, depending on where you live and what materials you use. The biggest cost is the HEPA filter, which is the heart of the system. Buying a used or off-brand filter can save money, but always check the filter’s specs.
Workspace
Make sure you have a clean, dry area to build your hood. Carpentry tools will be needed for the box, and you’ll need a safe space to test the fan and airflow before using it with mushrooms.
Materials And Tools You Need
Getting the right parts is crucial. Don’t cut corners on the filter or fan—these affect how well your hood works.
Main Materials
- HEPA filter: Look for a filter rated at 99.97% efficiency at 0.3 microns (the industry standard). Size: 24” x 18” x 6” is common.
- Pre-filter: Catches larger dust and extends the life of your HEPA filter.
- Blower/fan: Must deliver enough air flow (measured in CFM—cubic feet per minute) at the correct pressure for your filter.
- Plywood or MDF: For the box/cabinet. Use 3/4” thick for strength.
- Caulk or silicone sealant: To make airtight seals.
- Screws and wood glue: For assembly.
- Electrical switch and power cord: To turn the fan on and off.
- Metal screen or grill: Optional, to protect the filter face.
Tools Needed
- Circular saw or table saw
- Drill and bits
- Screwdriver
- Caulking gun
- Tape measure
- Pencil
- Level
- Safety goggles and mask
Where To Buy Key Parts
- HEPA filter: Laboratory supply stores, cleanroom suppliers, or online (e.g., eBay, laboratory surplus).
- Blower: HVAC supply stores, Grainger, or online marketplaces.
- Pre-filter: Any hardware store (furnace filter).
How To Choose The Right Hepa Filter And Fan
This is the most important part. Here’s a quick comparison of filter types:
| Filter Type | Efficiency | Typical Cost | Best For |
|---|---|---|---|
| HEPA (99.97% at 0.3μm) | Very high | High | Mushroom work, labs |
| ULPA (99.999% at 0.12μm) | Extremely high | Very high | Pharmaceuticals, microelectronics |
| Standard HVAC filter | Low | Low | Home heating/cooling |
Always use a real HEPA filter (not just a “HEPA-type” or “HEPA-style” filter). For mushroom work, 99.97% at 0.3 microns is sufficient.
Fan/blower Sizing
Your fan must push enough air through the filter to create laminar flow (smooth, even airflow). Too little, and the air is not clean enough; too much, and turbulence stirs up contaminants.
How to size your blower:
- Calculate the filter’s area: Multiply width x height (in feet). For a 24” x 18” filter: (2 ft x 1.5 ft) = 3 sq ft.
- Target air velocity: 100 feet per minute (fpm) at the filter face.
- Total airflow needed: Area x velocity. Example: 3 sq ft x 100 fpm = 300 CFM.
But, HEPA filters have resistance (called “static pressure,” usually 1.0 to 1.5 inches water gauge). Your blower must be rated to deliver the required CFM at the filter’s static pressure.
Here’s a simple table for reference:
| Filter Size (inches) | Area (sq ft) | CFM Needed | Static Pressure (in WG) |
|---|---|---|---|
| 24 x 18 | 3.0 | 300 | 1.0–1.5 |
| 24 x 24 | 4.0 | 400 | 1.0–1.5 |
| 36 x 24 | 6.0 | 600 | 1.0–1.5 |
Non-obvious tip: Always check the blower’s performance curve (provided by the manufacturer). It will show the CFM delivered at different static pressures. Don’t just buy a fan rated at “300 CFM”—it must be at the correct pressure.
Step-by-step Building Instructions
Now, let’s break down the process into clear steps.
1. Build The Main Box
- Cut your plywood or MDF panels to size: Back, sides, top, bottom, and a front frame.
- Screw and glue the panels together to form a box, with one side open (this is where the filter will go).
- Make sure all corners are square using a level.
- Seal all inner seams with caulk or silicone to make the box airtight.
Tip: Paint the inside with a gloss or semi-gloss paint. It’s easier to clean and disinfect.
2. Install The Hepa Filter
- The filter sits at the front of the box, sealed against the frame.
- Apply a thick bead of silicone around the opening and gently press the filter into place.
- Use screws or brackets to hold the filter securely, but do not overtighten (you can crack the filter frame).
- The filter’s “clean” side should face outwards (towards your workspace).
Insight: Handle the filter gently. Damaging the pleats or seals can ruin its performance.
3. Attach The Blower And Pre-filter
- The blower mounts behind the HEPA filter, inside the box.
- Attach a pre-filter at the air intake side of the blower (a simple furnace filter works).
- Screw or clamp the blower in place, making sure it’s airtight. Use foam weatherstripping if needed.
- Wire the blower to a switch and power cord. Always follow safety guidelines—if you’re not comfortable with electrical work, get help from an electrician.
4. Seal And Finish The Box
- Check all seams and joints for air leaks.
- Add more caulk or weatherstripping where needed.
- Install a metal grill or screen over the front of the filter for protection (optional).
- Add feet or pads to the base so the hood sits steady on a table or bench.
5. Test The Airflow
- Plug in the hood and turn it on.
- Hold a smoke source (like incense) a few inches in front of the filter. The smoke should move in a straight line away from the filter and not swirl or drift back.
- Use an anemometer (optional) to measure airflow. You want about 100 feet per minute at the center and corners.
Common mistake: If air leaks around the filter edges, you’ll get turbulence and lose sterility. Always double-check your seals.

Credit: www.youtube.com
Using Your Laminar Flow Hood Safely
A good hood is only part of the battle. Proper use is crucial for reliable results.
Cleaning And Maintenance
- Wipe down the work surface and filter face with 70% isopropyl alcohol before each session.
- Replace the pre-filter every few months or sooner if it looks dirty.
- HEPA filters last years if handled carefully, but replace if airflow drops or you notice contamination problems.
How To Work Sterile
- Turn on the hood 30 minutes before use to flush out any dust.
- Wear clean gloves, a mask, and tie back long hair.
- Keep all tools and materials downstream of the filter face.
- Never block the filter with your hands or containers—work at least 6 inches in front of the filter.
- Flame-sterilize tools (like scalpels) outside of the airstream, then bring them into the flow.
- Minimize talking, sneezing, or coughing during work.
Non-obvious insight: The flow hood does not sterilize surfaces—only the air. Always disinfect your workspace and tools before starting.
Troubleshooting Common Problems
Even well-built hoods can have issues. Here’s how to spot and fix them.
Low Airflow
- Check if the pre-filter is clogged—replace if needed.
- Make sure the fan is running at full speed.
- Inspect for air leaks around the HEPA filter or box seams.
Turbulence Or Swirling Air
- Ensure the filter is seated flat and sealed.
- Don’t put large objects too close to the filter face.
- If the fan is too powerful, add a speed controller or damper.
Contamination Still Occurs
- Double-check your sterile technique.
- Clean the hood and workspace thoroughly.
- If contamination continues, the HEPA filter may be damaged or leaking.

Credit: www.youtube.com
Pros And Cons Of Diy Vs. Commercial Hoods
Building your own laminar flow hood is rewarding but not for everyone. Here’s a quick comparison:
| Aspect | DIY Flow Hood | Commercial Flow Hood |
|---|---|---|
| Cost | Lower ($300–$700) | Higher ($1,000–$2,500+) |
| Customization | High (choose size, materials) | Limited to available models |
| Reliability | Depends on build quality | Very reliable, tested |
| Warranty | None | Usually included |
| Learning Value | High | Low |
Tip: If you enjoy DIY projects and want to save money, building is the best choice. If you need a guaranteed sterile environment and have the budget, commercial hoods are faster but much more expensive.
Real-world Examples And Tips
Many hobbyists and small mushroom farms use DIY laminar flow hoods. Some even start with a small hood and build a larger one as their needs grow. Here are a few practical tips from experienced builders:
- Use foam weatherstripping to seal the filter frame. It compresses better than silicone and is easier to replace.
- Mount the hood on a rolling cart so you can move it to different workspaces.
- Build a small shelf or tool holder inside the hood to keep alcohol wipes, scalpels, and petri dishes within easy reach.
- Label your hood with the date built and filter specs for easy future reference.
Non-obvious insight: If your workspace is dusty (like a basement), consider running the hood for 5–10 minutes before starting to let the air settle and reduce airborne particles.
Advanced Upgrades And Modifications
After building a basic hood, you might want to add some features:
Speed Controller
Adding a fan speed controller lets you fine-tune airflow. This is useful if your blower is slightly overpowered or if you change to a thicker filter in the future.
Uv Sterilization
A few builders add a UV-C light inside the box to sterilize the air intake and surfaces when the hood is not in use. Always turn it off before working—UV light is harmful to skin and eyes.
Sound Dampening
Some blowers are noisy. Lining the inside of the box (except the airflow path) with sound-absorbing foam can make long work sessions more comfortable.
Lighting
Attach an LED strip or lamp above the work area. Good lighting helps you see contamination and work more precisely.
Common Mistakes To Avoid
Many first-time builders make simple errors that reduce the effectiveness of their hood:
- Using the wrong filter: “HEPA-type” vacuum filters are not good enough. Use only true HEPA filters rated for cleanroom use.
- Under-powering the blower: Not enough airflow means the air isn’t clean or directional enough.
- Poor sealing: Air leaks are the main cause of failure. Always test for leaks before use.
- Placing objects too close: Keep at least 6 inches between your work and the filter to maintain laminar flow.
- Skipping pre-filters: They protect your expensive HEPA filter from dust and extend its life.
Costs And Where To Save Money
The HEPA filter and blower are your main expenses. You can save money by:
- Using reclaimed plywood or offcuts for the box.
- Buying a used blower from an HVAC shop.
- Shopping around for filters—sometimes laboratory surplus suppliers have new, old-stock filters at a discount.
But never compromise on the filter’s quality or the box’s air-tightness. These are essential for sterility.
Environmental And Safety Considerations
A flow hood uses electricity and may generate noise and heat. Place it in a ventilated area, away from open flames or chemicals. Always unplug before doing maintenance. If you add UV lights, use a timer switch and warning labels.
If you’re working with toxic mushroom species, dispose of waste responsibly. Wash hands and tools after every session.
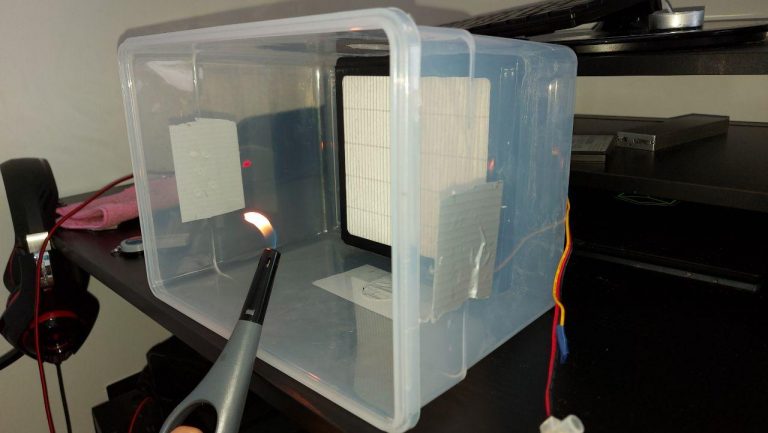
Credit: ezmushroom.com
Summary And Final Thoughts
Building a laminar flow hood is one of the best investments for anyone serious about sterile mushroom work. With careful planning and attention to detail, you can build a hood that rivals commercial units for a fraction of the cost. The key steps are choosing a proper HEPA filter, matching your blower, and ensuring all seals are airtight. Once built, regular cleaning and proper technique will give you reliable, contamination-free results for years. Every hour spent on your hood pays back with more successful mushroom harvests and less wasted time. For more details on HEPA standards and airflow, you can check the Wikipedia page on Laminar Flow Cabinets.
Frequently Asked Questions
How Long Will A Diy Laminar Flow Hood Last?
A well-built hood can last 10 years or more if you replace the pre-filter regularly and take care not to damage the HEPA filter. Most issues come from physical damage or blocked filters.
Can I Use A Bathroom Fan Or Box Fan For The Blower?
No, these fans do not provide enough pressure to push air through a HEPA filter. You need a squirrel cage blower or similar fan designed for high static pressure, like those used in HVAC or cleanroom systems.
Is A Still Air Box As Good As A Laminar Flow Hood?
A still air box is much cheaper but not as effective. It blocks drafts but does not clean the air. Contamination rates are higher, especially for agar work and grain transfers.
How Can I Tell If My Airflow Is Laminar?
Hold a strip of tissue or incense stick in front of the filter. The airflow should be smooth and straight, not swirling or turbulent. If you see swirling, check for leaks or obstructions.
Can I Build A Vertical Flow Hood Instead?
Yes, but it is more complicated and usually more expensive. For mushroom work, a horizontal flow hood is easier to build and works better for most users.
With the right approach, building your own laminar flow hood will give you a huge advantage in growing healthy, contamination-free mushrooms. Take your time, follow each step carefully, and you’ll soon have a professional-grade sterile workspace in your own home or lab.